
Leveling a floor means making the subfloor flat and smooth before installing new flooring. Small imperfections can become visible, especially with thin floor finishes like PVC and linoleum. With laminate, parquet, and tiles, height differences can make installation difficult or cause extra stress.
The right method depends on the type of subfloor. Leveling a concrete floor is usually done with leveling compound, while leveling a wooden floor requires special attention to the stability of the structure. Depending on the situation, you will use fiber-reinforced leveling compound or suitable floor panels.
Before you begin, check the flatness, moisture content, and load-bearing capacity of the subfloor. In this guide, you will learn which materials are suitable, how to determine the correct layer thickness, when the floor is ready for finishing, and what floor leveling costs per m² in the Netherlands.
What is floor leveling and when is it necessary?
Floor leveling is the process of eliminating surface imperfections and height differences using a suitable leveling compound or a dry floor system. The goal is to create a sufficiently flat, smooth, and stable base for the new flooring.
Leveling is not the same as structural repair. A floor with severe cracks, moisture problems, or sagging joists must be repaired first. Also, a self-leveling compound will not automatically make a steeply sloping floor completely level.
Which flooring requires leveling?
Whether leveling the subfloor is necessary depends on the floor finish and the manufacturer's flatness requirements.
For glue-down PVC and linoleum, a very smooth subfloor is important. Due to the thinness of the material, grains, seams, and other imperfections can become visible in the finished surface. Glued parquet also requires a stable and sufficiently flat base.
Click-PVC and laminate can sometimes compensate for minor deviations with a suitable underlay. However, this should not be used to hide larger height differences. With tiles, limited deviations can be corrected during installation, but the chosen adhesive and layer thickness set limits on that possibility.
The differences between glued and floating floor systems are discussed in more detail in our PVC flooring guide.
Checking the subfloor: flatness, moisture, and load-bearing capacity
Good preparation for floor leveling begins with a technical assessment of the existing subfloor. Simply cleaning and applying a primer is insufficient if the floor is, for example, too damp or unstable.
Three checks are decisive: flatness, moisture content, and the mechanical condition of the surface.
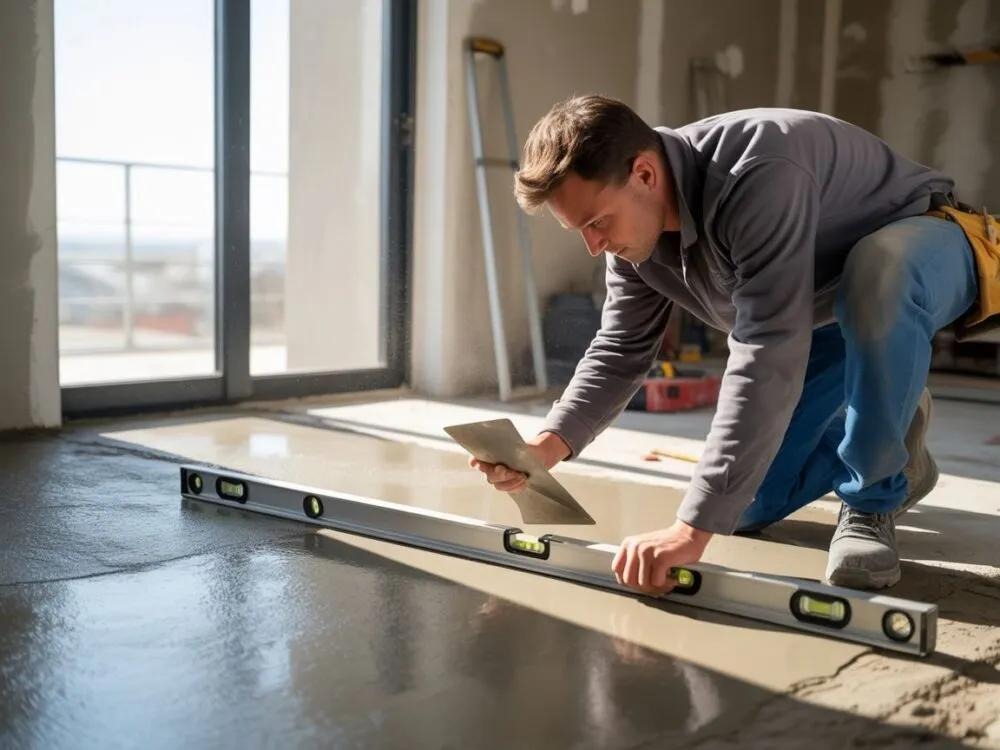
Measuring floor flatness
You can check the flatness of a floor using a 2-meter straightedge. Place the straightedge on the floor in several places and in different directions. Measure the largest gaps between the straightedge and the surface.
This reveals local dips, protruding parts, and larger height differences.
The permitted deviation is not the same for every floor. The requirements are determined by the chosen flooring product, the installation system, and the applicable technical regulations.
Glue-down PVC generally has stricter requirements for smoothness and flatness than a floating laminate floor. Therefore, do not use a general tolerance as a substitute for the manufacturer's installation instructions.
Checking the moisture content of the screed
A subfloor may appear dry on the surface while still containing too much residual moisture. This must be checked before further finishing, especially with new cement screeds and anhydrite floors.
To determine the residual moisture in a screed, the flooring industry uses methods such as the CM method. This carbide measurement determines the moisture content of a material sample.
In practice, the following limit values apply:
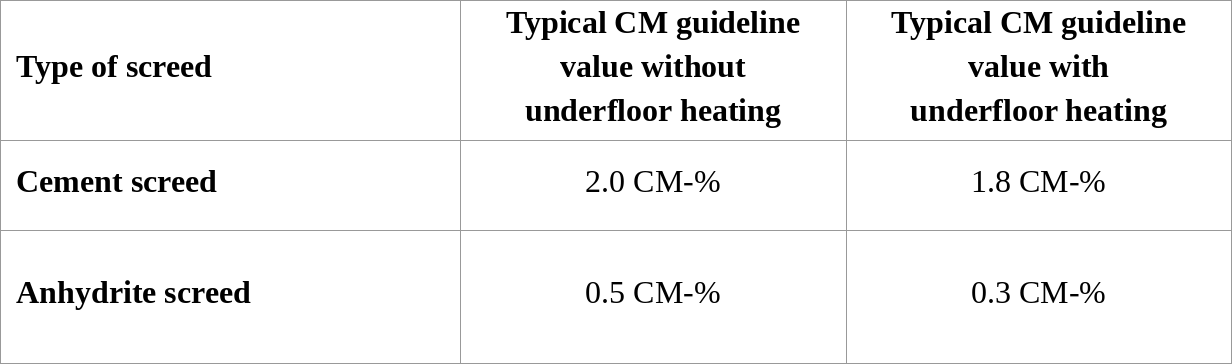
Important: these are common guidelines, not universal limit values for every combination of primer, leveling compound, adhesive, and floor covering. Manufacturers may have different requirements. The actual permissible residual moisture value must always be checked against the chosen flooring system.
Rising damp or a missing moisture barrier can also cause problems. Leveling compound is not a solution for structural moisture migration from the subfloor.
Assessing load-bearing capacity and damage
The subfloor must be sufficiently firm, stable, and free of loose parts. Check for cracks, damage, old adhesive residues, and poorly adhering surface layers.
Small, stable cracks can be treated with a suitable repair system. For cracks that continue to move, the cause must be investigated first.
Old adhesive residues also require attention. Not every existing adhesive layer is suitable as a base for new leveling. Water-soluble residues and poorly adhering layers, in particular, can cause problems.
For wooden floors, any loose boards, protruding fasteners, and potential sagging must also be addressed.
Self-leveling compound, primer, or sand-cement: what should you use?
The material used for floor leveling is chosen based on the type of subfloor, the required layer thickness, and the future floor finish.
Self-leveling compound is a relatively fluid leveling mortar used to correct small to medium-sized irregularities. For larger height differences or a completely new floor structure, a repair mortar, sand-cement screed, or another system designed for that purpose may be more suitable.
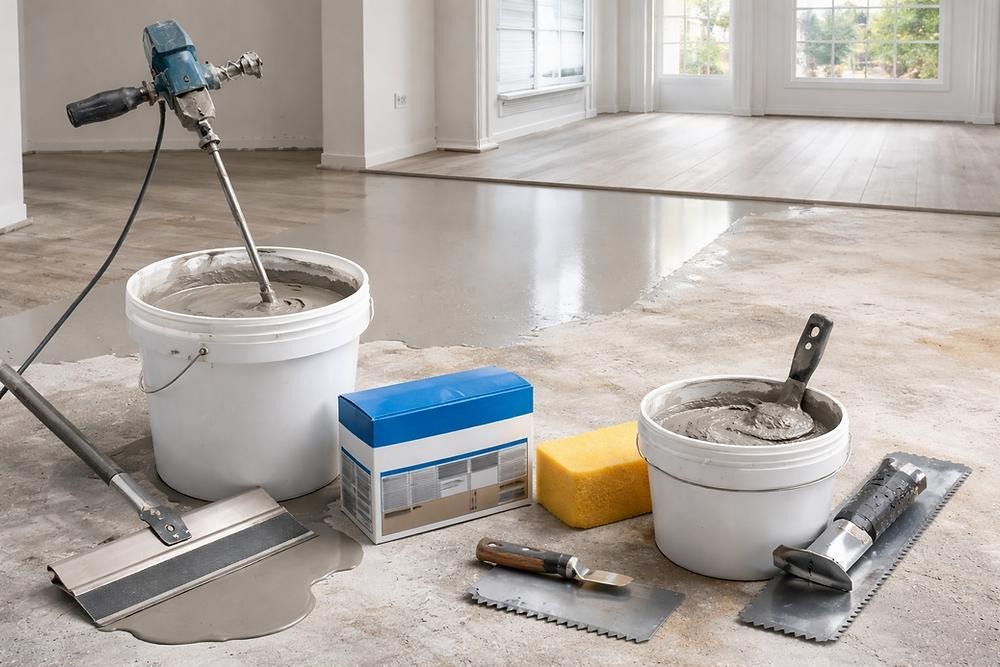
Which self-leveling compound is suitable?
There are cement-based, calcium sulfate-based, and specialized leveling agents for a wide variety of subfloors.
Cement-based leveling compound is widely used on concrete and cement screeds. For anhydrite floors, you must choose a product that is explicitly suitable for a calcium sulfate-based subfloor.
For certain wooden floors, there are special, often fiber-reinforced leveling agents that account for the properties of the underlying material.
The permitted layer thickness varies by product. Some compositions are intended for thin finishing layers, while others are suitable for thicker applications.
When is a primer necessary?
For many systems, a primer for self-leveling compound improves adhesion and regulates the absorbency of the subfloor. On a highly absorbent floor, a suitable primer can prevent the mixing water from being drawn out of the leveling mortar too quickly.
However, not every self-leveling compound requires a separate primer. There are products that can be applied directly to certain prepared mineral subfloors.
Therefore, always use a combination of primer and self-leveling compound that the manufacturer deems suitable for your specific situation.
Leveling a concrete floor: step-by-step guide
Leveling a concrete floor is generally straightforward, provided the subfloor is stable and sufficiently dry. In homes, this often involves a cement-based screed on top of a concrete structural base.
Preparation accounts for a significant part of the work. An improperly cleaned or insufficiently firm surface can lead to poor adhesion of the new leveling layer.
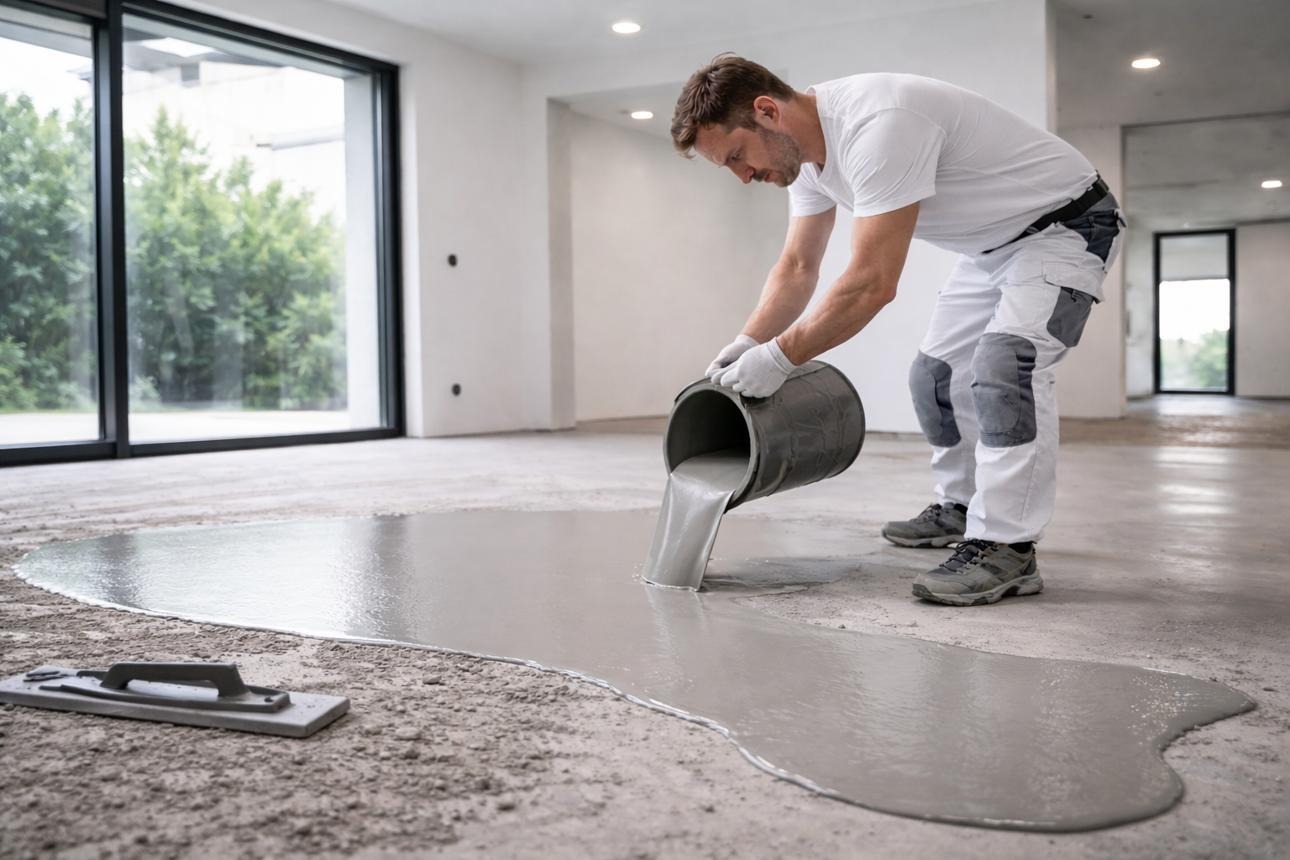
Preparing the concrete floor and applying the leveling compound
Leveling a concrete subfloor usually involves five steps:
- Prepare the subfloor. Remove loose debris, dust, grease, and unsuitable adhesive residue. Repair any damage and check for flatness.
- Apply primer if required. Choose the specified primer and observe the stated drying time.
- Mixing the leveling compound. Use the exact amount of clean water specified in the technical product data sheet and mix for the required duration.
- Spreading the leveling compound. Pour out the mortar and spread it to the required layer thickness using a squeegee or flat trowel.
- Allow the layer to dry. Deaerate the surface if the system requires it and protect the floor from unfavorable drying conditions.
Never add extra water to re-liquefy a mixture that has already begun to set. Too much water can reduce strength, adhesion, and surface quality.
Work within the product's pot life. For larger surfaces, ensure sufficient personnel and equipment are available to prevent visible seams.
Leveling an anhydrite floor
Leveling an anhydrite floor requires appropriate pretreatment. The surface may have a weak top layer that must be removed before leveling, for example by sanding.
Afterward, the floor is made dust-free and, if required, treated with a primer suitable for calcium sulfate-bonded screeds.
Use only a leveling compound approved for this substrate. Additionally, check the residual moisture before installing a moisture-sensitive floor finish.
What layer thickness of leveling compound do you need?
The layer thickness of the leveling compound is determined by the measured height differences, the properties of the subfloor, and the specifications of the chosen product.
As a technical example: Forbo Eurocol 990 Europlan Direct has a specified layer thickness of 2 to 20 mm for certain applications. For a specific application on wooden floorboards, the same manufacturer describes a system with a minimum layer thickness of 3 mm.
This illustrates why the product name and the substrate together determine what layer thickness is possible.
For larger deviations, prior repair with a suitable repair mortar may be more economical and technically sound than raising the entire floor with leveling compound.
How much leveling compound do you need?
To calculate the material required, multiply the floor area by the average layer thickness and the specified consumption per millimeter.
A common consumption rate for certain leveling compounds is approximately 1.5 kg per m² per mm of layer thickness. This is a product-specific value, not a universal standard.
Example for a 20 m² floor with an average leveling thickness of 3 mm:
20 m² × 3 mm × 1.5 kg = 90 kg of leveling compound.
With 23 kg bags, you will need at least four bags, totaling 92 kg. Account for potential waste and local variations in layer thickness.
Always check the actual material consumption on the technical product data sheet before purchasing.
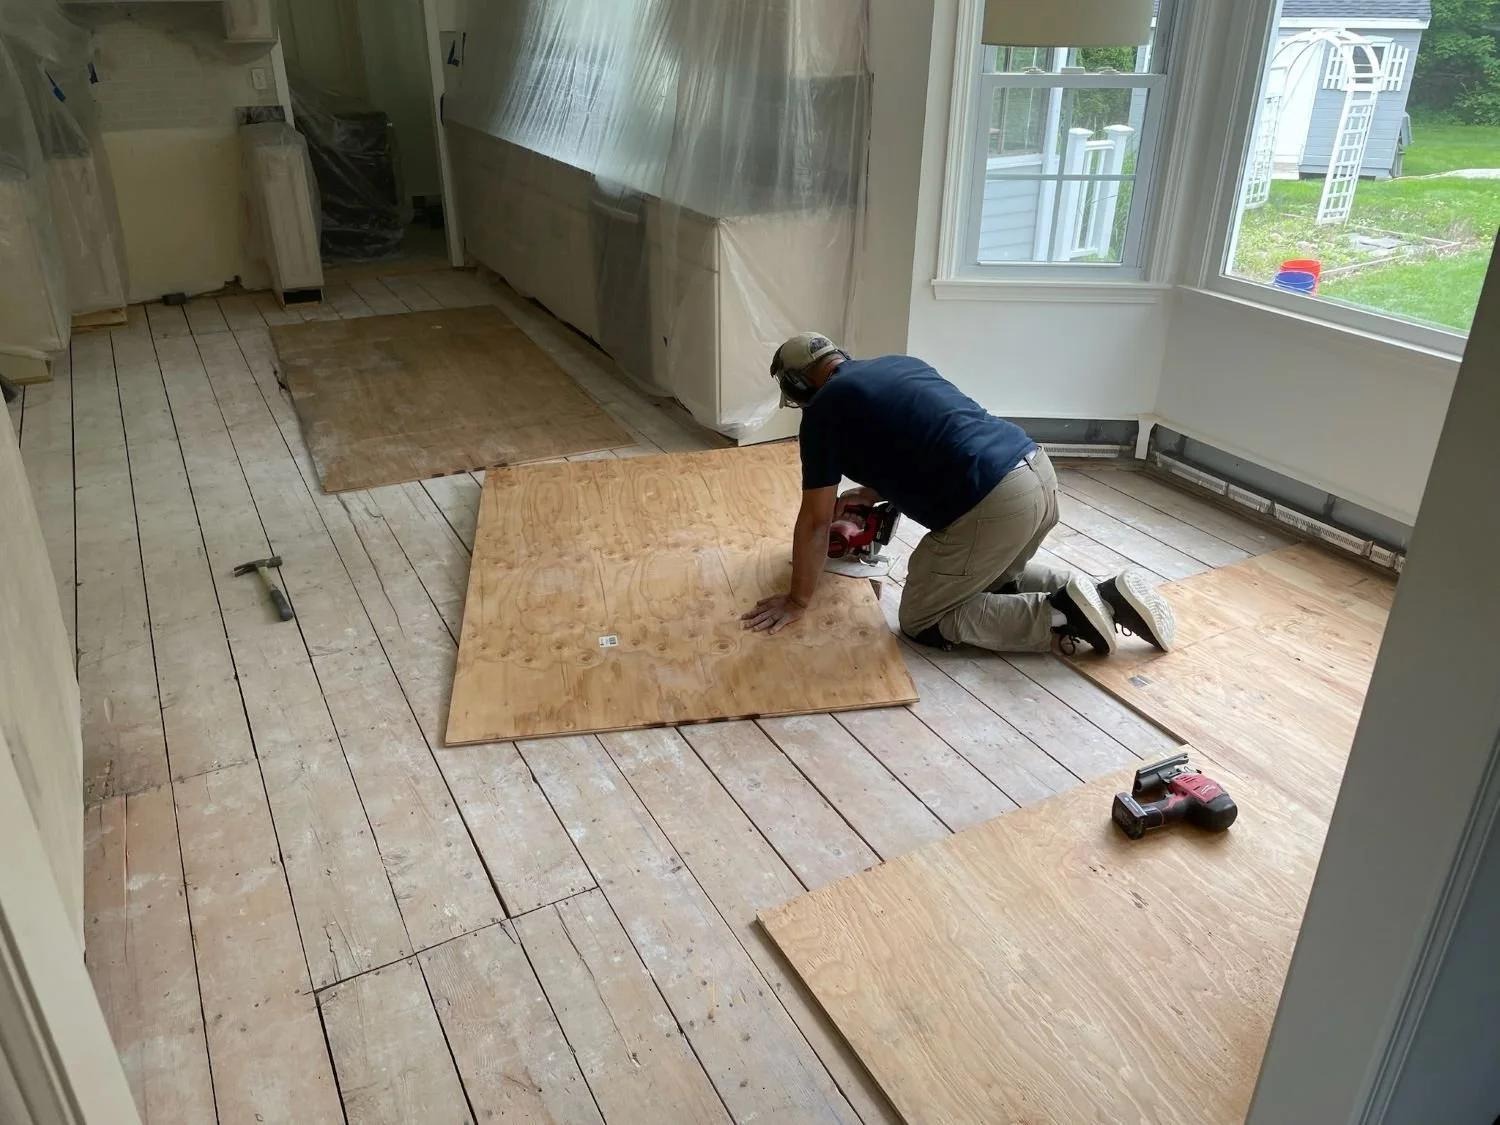
Leveling a wooden floor: fiber-reinforced leveling compound or boards?
Leveling a wooden floor requires a different approach than concrete. Wood reacts to changes in temperature and humidity. In addition, a wooden floor structure can move slightly under load.
A standard, thin leveling layer may crack as a result if the subfloor is not sufficiently stable.
Checking the wooden floor
First, check that all floorboards are securely fastened. Loose planks, squeaky joints, or noticeable deflection may indicate a problem with the underlying structure.
For older wooden floors, it is wise to also assess the joists and, if present, the crawl space. Look out for moisture problems, wood rot, and insufficient load-bearing capacity.
If the floor is being opened up anyway, this is a good time to also explore the possibilities for floor insulation .
Leveling cannot repair an unstable support structure. Structural defects must be resolved first.
Leveling a wooden floor with fiber-reinforced leveling compound
On certain stable wooden subfloors, you can use fiber-reinforced leveling compound.
These products contain or combine with reinforcing fibers that help absorb stresses in the leveling layer. This does not mean the layer can compensate for significant deflection of floor joists or loose planks.
Forbo Eurocol, for example, describes a system for wooden floorboards using a suitable primer, leveling compound, and reinforcing fibers. For the described application, a minimum layer thickness of 3 mm applies.
UZIN also offers leveling systems specifically developed for wooden and other renovation subfloors.
The prescribed pre-treatment, any necessary seam reinforcement, and the minimum layer thickness vary by system. Therefore, do not use standard leveling compound for concrete without confirmation that the product is also suitable for the wooden subfloor.
Leveling a wooden floor with boards
An alternative is dry leveling using floorboards. Depending on the construction and the intended final finish, suitable plywood, underlayment, or gypsum fiber floor elements can be used for this purpose.
The boards are installed according to the chosen system's specifications or placed as part of a dry floor assembly.
The advantage is that very little additional construction moisture is introduced. Furthermore, a correctly designed board assembly can contribute to a more stable subfloor.
Keep in mind the additional build-up height. Check the clearance for doors, thresholds, and adjacent rooms in advance.
The additional weight and the load-bearing capacity of the existing floor structure must also be assessed.
Drying time of leveling compound: when can the new floor be installed?
The drying time of leveling compound depends on the product, the layer thickness, the temperature, the humidity, and the ventilation.
It is important to distinguish between walkable and ready for installation. A floor may be hard enough to walk on carefully, while not yet suitable for gluing or installing the final floor covering.
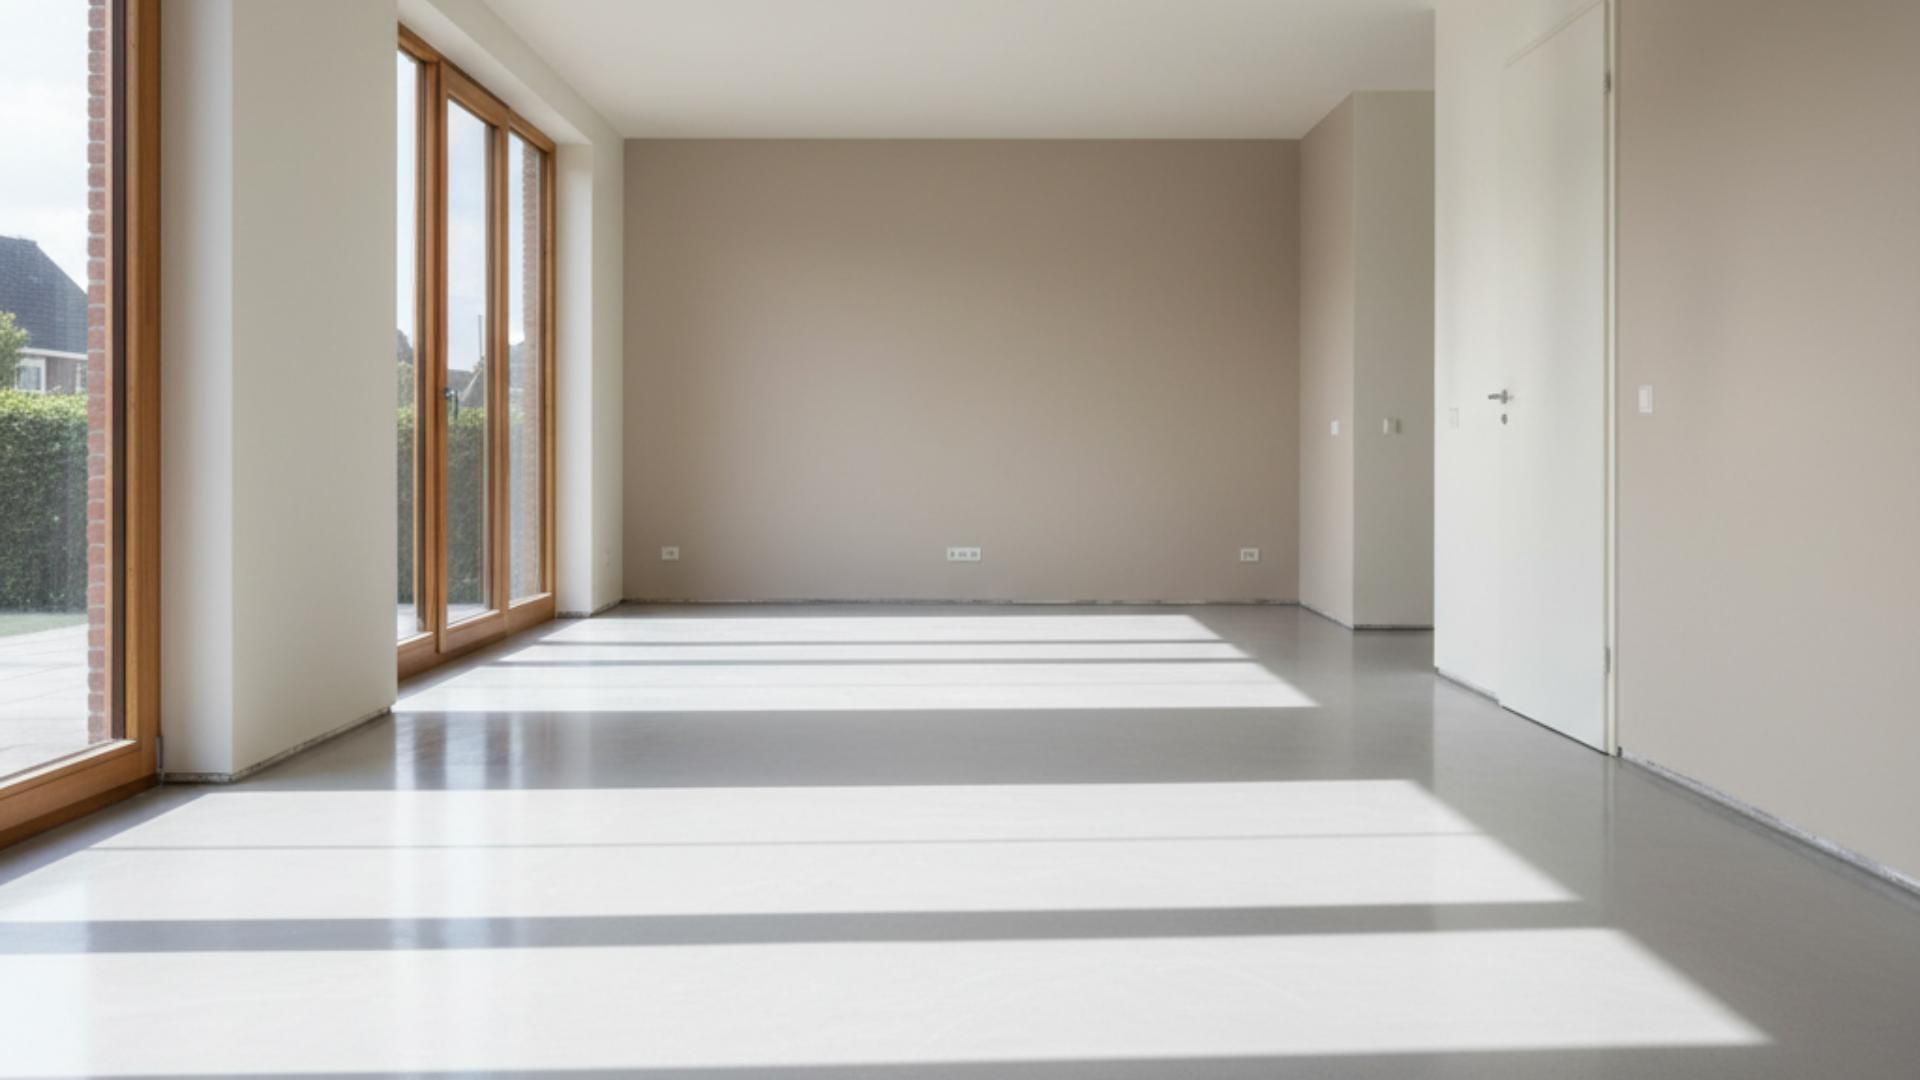
Walkable and ready for installation
With various leveling compounds, the floor is generally walkable with care after about 2 to 3 hours under normal conditions. For certain products and layer thicknesses, a guideline of approximately 24 hours applies before the floor can be finished further.
These times should not be applied to all leveling compounds. Fast-drying products, thicker layers, and deviating conditions may require different waiting times.
Especially when installing PVC after leveling, the floor must meet the requirements for the adhesive and floor covering used.
Optimal conditions during drying
Drying too quickly or unevenly can compromise the quality of the leveling layer. Therefore, ensure the temperature and ventilation prescribed by the manufacturer are maintained.
Avoid strong drafts, direct sunlight, and uncontrolled increases in heating.
Only use a construction dryer or dehumidifier if it is consistent with the application instructions for the chosen product.
Leveling a floor with underfloor heating
When leveling a floor with underfloor heating, the leveling compound must be suitable for temperature fluctuations and the construction of the heating system.
Before leveling, check that the underfloor heating has been installed and tested correctly. For new heated screeds, a prescribed heating and cooling protocol may be required before the floor is finished.
During application and drying, the temperature must be regulated according to the manufacturer's instructions. Do not use the underfloor heating on your own initiative to speed up the drying of the leveling compound.
When finishing milled-in pipes or heating mats, product-specific requirements for minimum coverage also apply.
More information about suitable systems and floor finishes can be found in our underfloor heating guide.
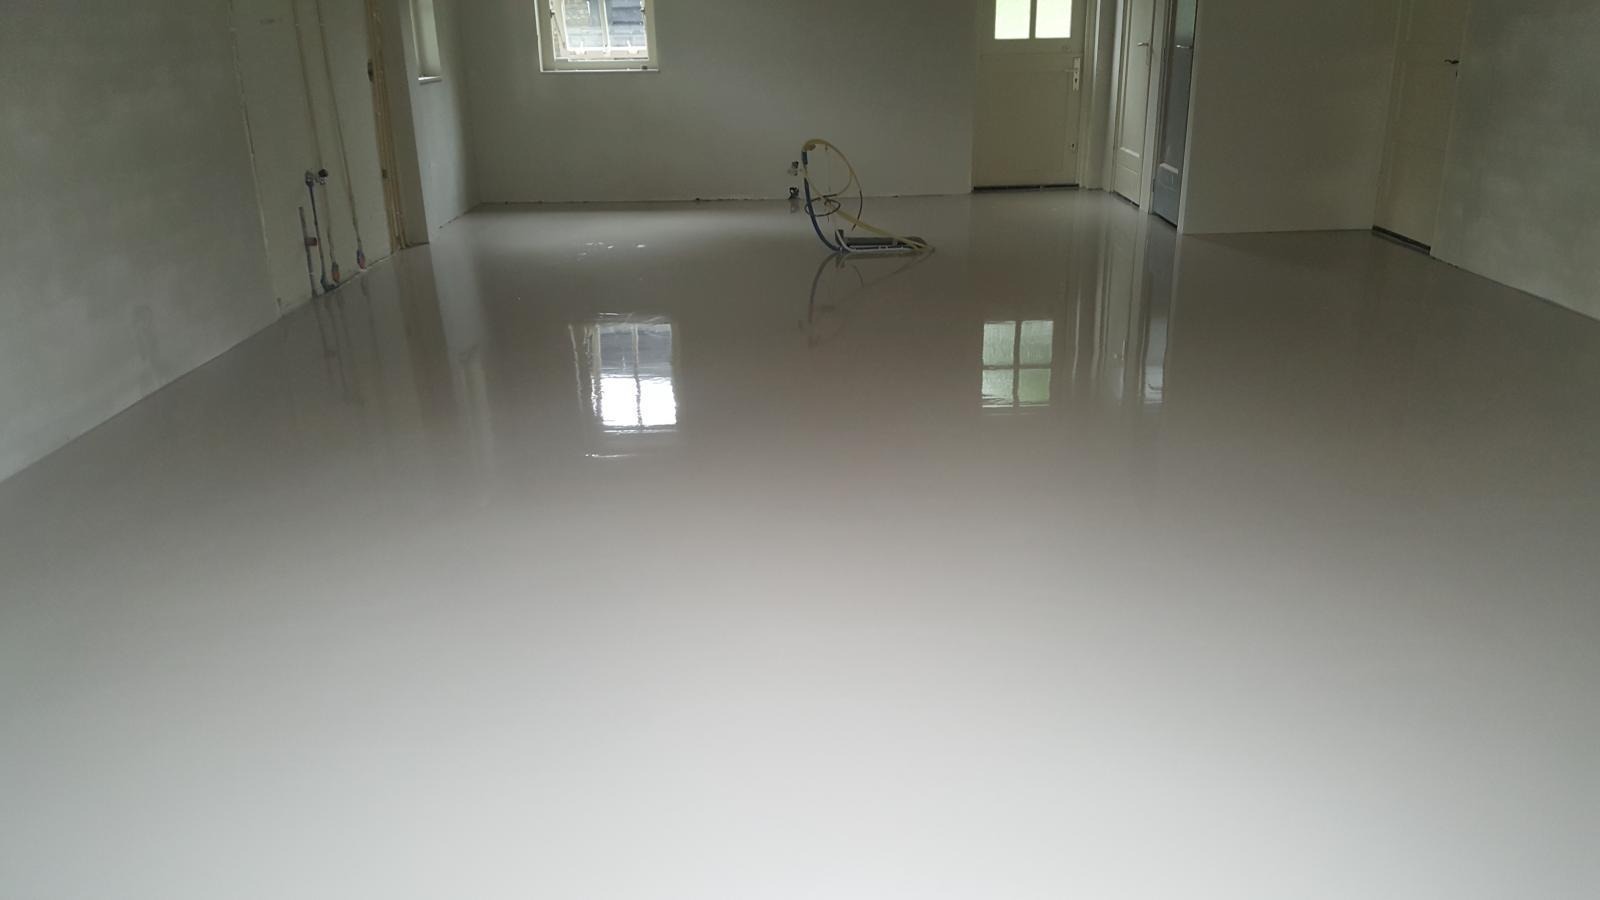
How much does floor leveling cost in 2026?
The cost of floor leveling varies depending on the subfloor and the required preparation. A flat concrete floor with minor imperfections is generally cheaper than a wooden floor that first needs to be reinforced.
Floor leveling costs per m²
For the Netherlands, the following general amounts are cited in 2026 price indications.
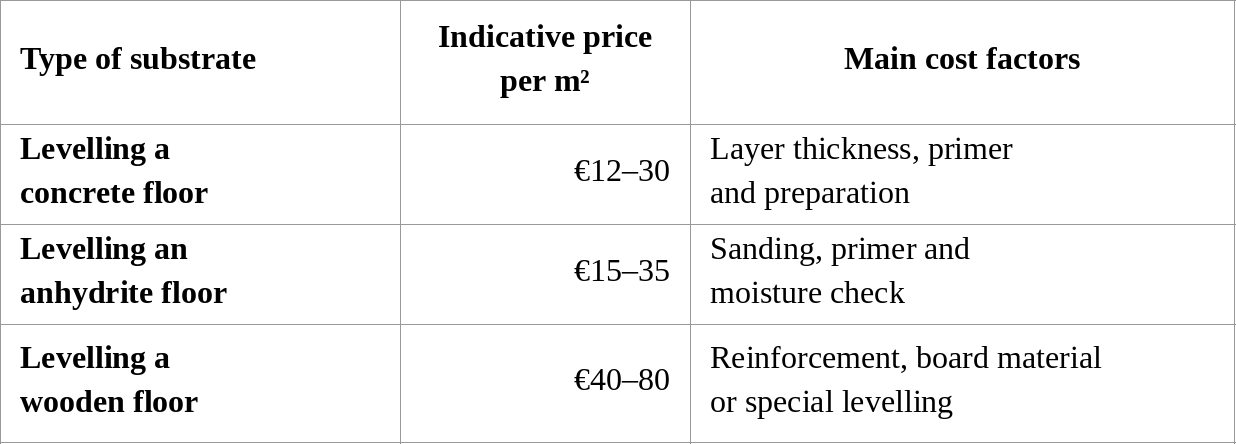
These amounts are market indications, not fixed rates. When reviewing quotes, check whether VAT, preparatory work, and materials are included.
For wooden floors with structural defects, costs can be significantly higher.
Example calculation for 50 m²
For a stable concrete floor of 50 m², the indicative price at €12–30 per m² is approximately €600–1,500.
For a wooden floor of the same size, the calculated price based on €40–80 per m² is between €2,000 and €4,000.
The actual amount depends on the necessary work. You will pay less for a thin leveling layer than for a floor that requires crack repairs, additional sheet material, or a completely new subfloor structure.
What should be included in a quote?
Compare quotes based on the same scope of work. A good estimate clearly outlines the required preparation and the specific leveling system being used.
Pay attention to:
- Assessment of the subfloor and any moisture measurements.
- Removal of old flooring, adhesive residue, and damaged sections.
- The primer used, the leveling compound, and the average layer thickness.
- Any sheet material or structural repairs for wooden floors.
- Labor costs, materials, transport, VAT, and the finishing schedule.
At Bricknest, subfloor preparation and the installation of the new floor can be planned as integrated parts of a renovation. This ensures it is clear in advance what work is needed before the final flooring can be installed.
If you are still deciding between different types of flooring, our comparison also helps Choosing between PVC or laminate to better assess the subfloor requirements and total costs.
Frequently asked questions about floor leveling
The most important questions regarding leveling work concern the choice of materials, the necessary preparation, and when the new floor can be installed.
Can I level a concrete floor myself?
Leveling a small, stable concrete floor yourself is possible if you have experience with the preparation and application of leveling compound. For larger surfaces, moisture issues, or significantly varying layer thicknesses, professional execution is advisable.
Can I level a wooden floor without using boards?
Yes, a special fiber-reinforced leveling system can be used on certain stable wooden subfloors. The floor must be sufficiently rigid and receive the prescribed pretreatment. In cases of significant deflection or damaged joists, the structure must be repaired first.
How thick should leveling compound be?
The required layer thickness of leveling compound depends on the chosen product, the subfloor, and the measured height differences. Some products are suitable for layers of a few millimeters, while others can be applied more thickly. Always check the minimum and maximum thickness in the technical product data sheet.
How long does leveling compound need to dry before installing PVC?
Some products are suitable for further finishing after approximately 24 hours at a limited layer thickness, but this does not apply to all systems. Take the prescribed waiting time and drying conditions into account. Being walkable does not automatically mean it is ready for PVC installation..
Can I level over existing tiles?
This is possible with suitable leveling systems if the existing tiles are firmly attached, sufficiently clean, and correctly pretreated. Loose or hollow-sounding tiles must be addressed first. Also, keep the additional floor height in mind.
Why does leveling compound crack?
Cracks in leveling compound can occur due to an insufficiently stable subfloor, incorrect mixing ratios, wrong layer thickness, poor adhesion, or unfavorable drying conditions. With wooden floors, movement of the structure plays an additional role.

Conclusion: a good floor starts with the subfloor
Floor leveling is an important preparation for PVC, laminate, parquet, and other floor finishes. The right method depends on the condition of the subfloor and the technical requirements of the new flooring system.
Leveling a concrete floor is usually done with a suitable leveling compound. For leveling a wooden floor, the stability of the structure and the choice between fiber-reinforced leveling compound or a dry board construction are decisive.
Before starting work, check the flatness, residual moisture, and load-bearing capacity. Then, choose an appropriate leveling system and respect the prescribed layer thickness and drying time.
This is how you create a reliable subfloor and prevent problems with the new floor covering.

