At first glance, laminate seems like a simple floor finish, but the end result depends a lot on preparation and technical implementation. A small error in the subfloor, a missing expansion joint or the wrong subfloor can later lead to cracking panels, open seams or bulging. If you want to lay laminate sustainably and tightly, you should therefore not start with the first board, but with the condition of the existing floor and the manufacturer's installation instructions.
Good installation requires accuracy, the right material and sufficient attention to detail. This manual explains the most important steps: from checking the surface to finishing with skirting boards. The focus is on practical implementation, so that the floor not only looks good, but also remains stable during daily use.
Subfloor preparation
The subfloor largely determines how well the laminate stays in place later. Laminate is a floating floor, which means that the panels are not glued to the base. As a result, the surface must be flat, clean, dry and stable. Anomalies that were barely visible under tiles or carpets can quickly cause problems with laminate.
For renovation projects, Bricknest therefore first checks the technical condition of the floor before choosing the finish. This prevents a new floor from being laid on a base that actually needs to be leveled, repaired or dried first.
Floor level control
The surface must be as flat as possible. Large differences in height cause laminate panels to be stressed. This can lead to cracking, bending or damage to the click system. Check the floor level with a long trip, level or laser. Especially in older homes in the Netherlands, slight sagging or uneven concrete floors occur regularly.
If the deviations are too large, the floor must be leveled first. Small imperfections can often be covered with a suitable subfloor, but this is not intended to correct large differences in height. Anyone who gets over this too quickly usually only notices the problem after the floor has been fully laid.
.webp)
Surface cleaning
Before laying, the floor must be free of dust, sand, glue residues and loose dirt. Even small particles under the subfloor can cause audible friction later. First, use a broom or vacuum cleaner and then check the corners, edges and transitions at doors.
When renovating after demolition, extra attention is needed. Remains of old carpeting, carpet adhesive or cement veil must be removed. A clean base ensures that the subfloor fits neatly and does not shift while installing the panels.
Drying the subfloor
Laminate should only be laid on a dry surface, where the allowable moisture percentage depends on the type of subfloor, the existing base and the manufacturer's regulations. Moisture is one of the biggest risks for this floor finish. It can cause the panels to expand, open seams or damage the top layer. With a new cement screed or leveling layer, sufficient drying time must be maintained.
When in doubt, a moisture measurement is wise. This certainly applies to ground floor floors, new-build homes or areas where there has been a leak before. Laminate itself also needs to acclimatize: according to the manufacturer's instructions, leave the packs in sealed packaging in the room where they are placed, often for at least 48 hours.
Materials and tools required
Neat installation begins with the proper preparation of material and tools. Not every type of laminate fits every space. In bathrooms, washrooms and other wet areas, standard laminate is usually not a safe choice; only use products that have been explicitly declared suitable for humid areas and follow the manufacturer's complete sealing system. The choice of the subfloor also depends on the existing basis, noise standards, floor heating and desired walking comfort.
If you lay all the laminate you need in advance, you will prevent interruptions during work. This is important because the first rows determine the direction and stability of the entire floor.
Subfloor
The subfloor has several functions. It dampens impact noise, captures minor imperfections and can help regulate heat or humidity. In apartments, noise reduction is often extra important, because VvE rules, the division act or house rules may set requirements for impact noise reduction and the type of subfloor.
When choosing the subfloor, pay attention to:
- suitability for concrete, wood or existing floor finishes;
- any vapor barrier effect;
- compatibility with floor heating and the maximum thermal resistance of laminate plus subfloor;
- impact noise reduction in decibels;
- maximum allowable thickness under the chosen laminate.
A subfloor that is too soft or too thick can strain the click system. The panels then spring too much, which can cause seams to come loose. Therefore, choose not only on price, but especially on technical suitability.
.webp)
Laminate
Laminate is chosen based on appearance, thickness, wear class and intensity of use. A lighter use class is often sufficient for bedrooms, while corridors, living rooms and kitchens receive more stress; in kitchens, attention must also be paid to moisture resistance, seam sealing and the risk of leakage. This requires a stronger product with a good wear-resistant top layer.
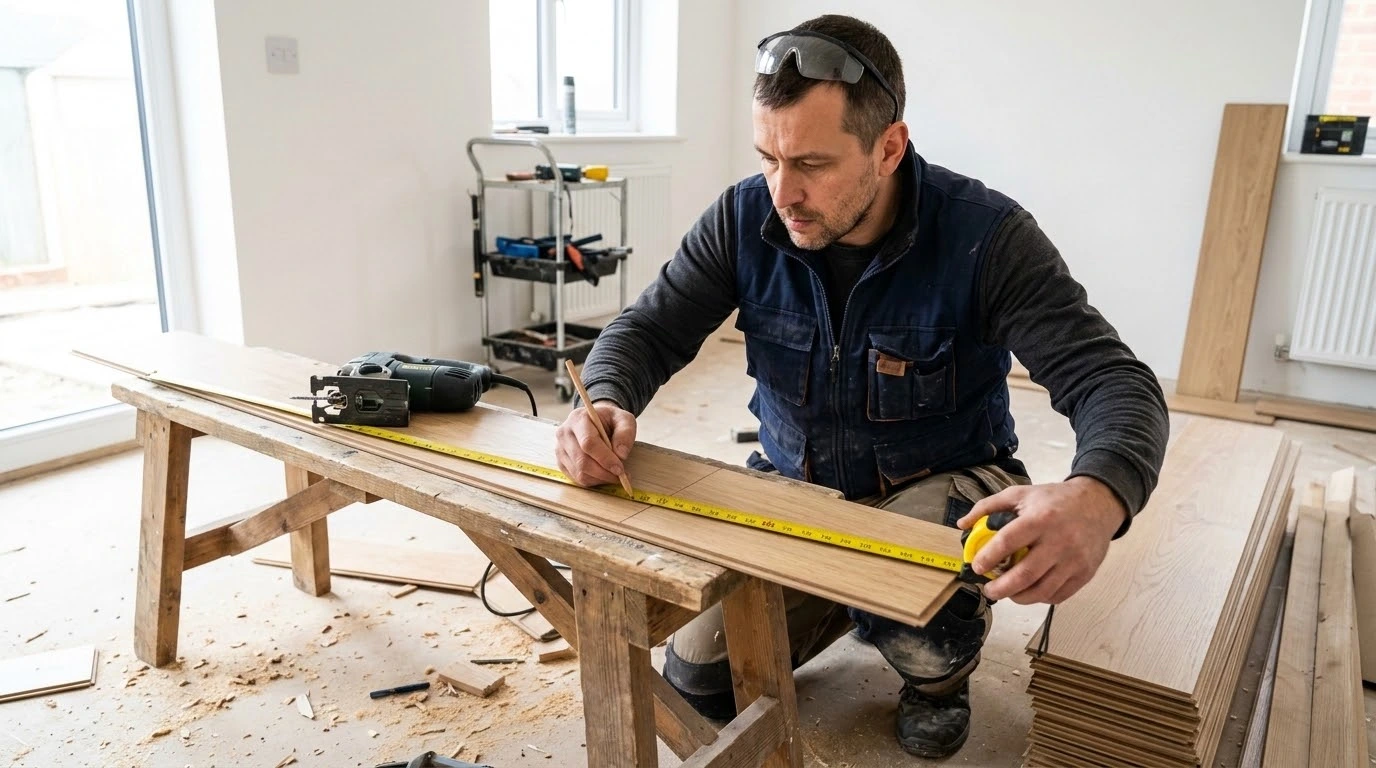
Thickness also plays a role. Thicker laminate often feels more stable, but should still match door heights, skirting boards and transitions to other floors. Before purchasing, check how much cutting loss is required. Straight spaces usually require less margin than rooms with many corners, niches or pipes.
Tools
Good tools are essential for a tight result. Laminate flooring cannot be laid accurately with just a hand saw and tape measure. Precision is especially important when it comes to the last row, door frames and pipes.
Preferably use:
- tape measure and pencil for sizing;
- jig saw, cut-off saw or laminate cutter;
- spacer wedges for expansion joints;
- stop block and pull iron;
- rubber hammer;
- angle hook for straight cutting lines;
- safety glasses and knee protection.
With the right tools, the panels will not be unnecessarily damaged during connection. Never hit the edge of the laminate directly with a hammer, as the click system may break.
Technology of laminate laying
The installation itself must be done calmly and systematically. The first row defines the line of the entire floor. If it is skewed, the deviation becomes more visible with each subsequent row. Therefore, measure the space thoroughly beforehand and determine the laying direction before installing the first shelf.
In many homes, laminate is laid in the longitudinal direction of daylight, because seams are then less noticeable. In narrow spaces, on the other hand, it may be better to choose the direction that makes the room visually longer or wider. These are practical laminate laying tips that often make the difference between a floor that only looks neat and a floor that remains technically stable.
Laying the subfloor
The subfloor is rolled out over the entire surface or laid in plates. The lanes must fit tightly together, but must not overlap if the manufacturer does not prescribe it. Concrete floors sometimes require a vapour barrier, especially when the subfloor itself does not have that function.
Always work in the same direction and avoid creases. A subfloor that is not flat can later become visible in the running behavior of the laminate. Cut the subfloor neatly along walls and obstacles, without leaving large gaps.
First row
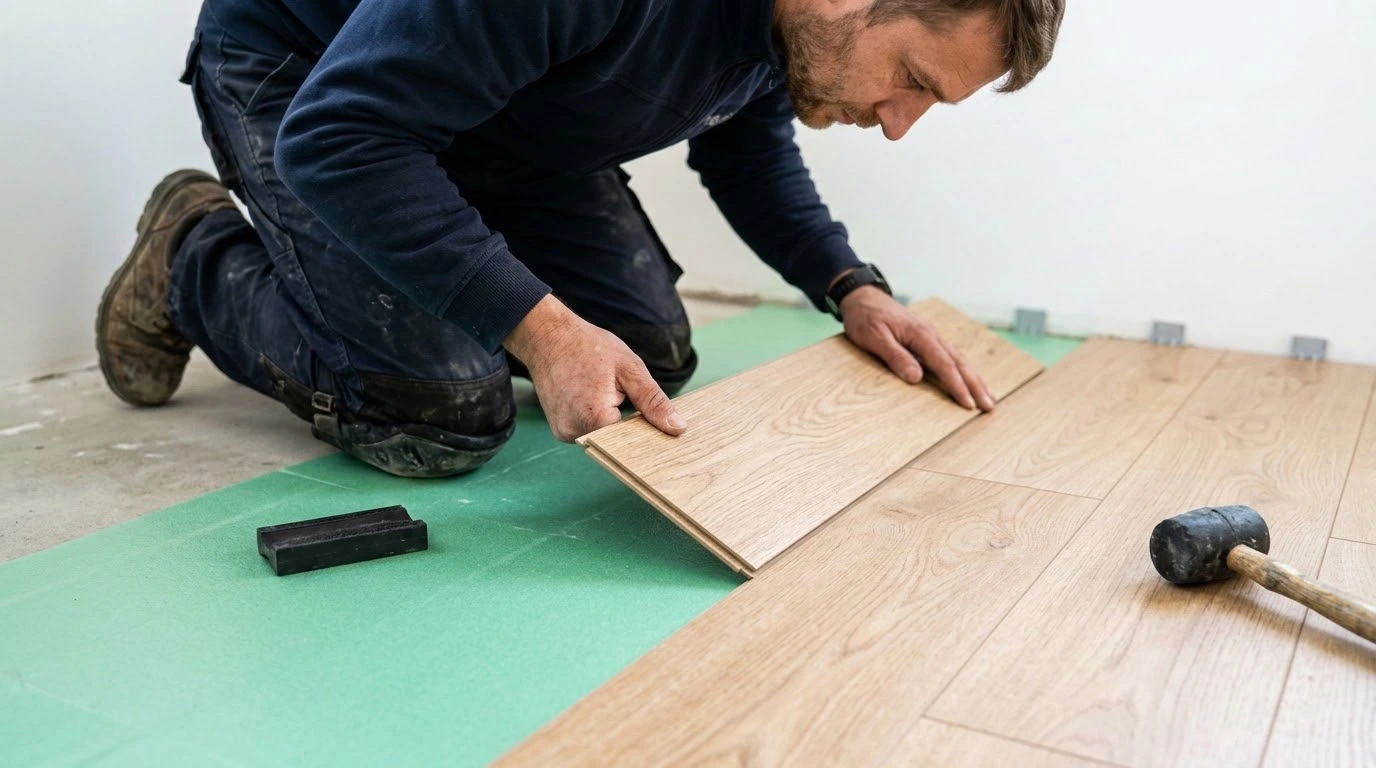
The first row is placed along the wall with spacer wedges. These wedges provide an expansion joint, whose width should be chosen according to the manufacturer and is often around 8 to 10 mm in practice. Laminate works under the influence of temperature and humidity. Without space at the edges, the floor has nowhere to go, allowing the panels to rise.
Make sure the wall is straight. Many walls are slightly crooked, especially in older homes. In that case, the first row may need to be adapted to the wall line. The visible floor must lie straight, not simply follow the deviation from the wall.
Connecting the panels
Most laminate floors are installed with a click system. The panels are assembled at an angle and then gently pressed down. The exact system varies by manufacturer, which is why the assembly instructions should always be followed.
Do not force the click system. If a board does not close properly, there is usually dirt in the groove, the angle is wrong, or the previous row is not tight enough. Check each connection immediately. A small gap at the beginning can be difficult to correct later.
Long jump of the seams
Each subsequent row must be laid with staggered end seams. This ensures stability and a more natural floor appearance. Avoid that short seams in adjacent rows are too close together. Only use leftover pieces if they are long enough and are technically compatible.
When cutting the first board of a new row, the pattern must be taken into account. A staircase motif that is too regular looks unnatural. A slight variation gives the floor a calmer and more professional look.
Finalizing the placement
The last row often requires the most measuring work. Measure the remaining width at multiple points, as walls rarely run completely straight. Keep the expansion joint on here too. Use a pull iron to gently pull the last panels into the click system.
After laying, spacer wedges are removed and skirting boards are installed. The skirting boards cover the expansion joints, but must not clamp the floor and must be attached to the wall, not to the floating laminate. Profiles or rosettes are used for pipes, door frames and transitions. In this phase, Bricknest pays a lot of attention to finishing, because small details determine whether a floor really looks neat.
Laying errors
Many problems with laminate do not arise because of the material itself, but due to errors during preparation or assembly. A floor can look good right after installation, but start to creak, slide or bulge after a few weeks. That is why it is important not to underestimate the technical basis.
If you want to lay laminate yourself, you should pay particular attention to three points: the flatness and dryness of the surface, sufficient expansion space and the right subfloor for the room and the chosen laminate. These parts are less visible than the color or design, but they determine the longevity of the floor.
Uneven surface
An uneven base causes movement in the panels. This creates tension on the click connections. Over time, seams may open or panels may break at weak points. Cracking noises can also often be traced back to a poorly prepared surface.
Therefore, always check the surface before purchase and installation, so that it is clear whether equalization, moisture measurement, repair or a specific subfloor is necessary. Leveling takes extra time, but prevents the entire floor area from having to be removed again later.
.webp)
No expansion joints
Laminate must be able to work freely all around. A missing or too small expansion joint is a common mistake. Especially with larger spaces, long corridors or continuous floors between several rooms, tension can occur, which may require expansion profiles or transition profiles in accordance with the installation instructions.
Pay particular attention to these zones:
- walls and fixed closets;
- door frames and sills;
- heating pipes;
- transitions to other spaces.
The joint is later finished with skirting boards or profiles. It is therefore technically necessary, but does not have to be visually disturbing.
Wrong subfloor
The wrong subfloor can reduce the lifespan of the laminate. Too thick material makes the floor unstable. A subfloor without a vapor barrier function can cause problems on concrete, cement screeds or ground floors when residual moisture or rising moisture is present. A product that is not suitable for floor heating can retain or deform heat.
Therefore, always check the combination of laminate, subfloor and existing base. The best choice is not universal, but depends on the space, construction and intensity of use. A technically correct structure increases the chance that the floor stays tight, feels comfortable and can withstand daily use.
