At Bricknest, we always strive for the highest comfort and maximum energy efficiency in every home. A well-chosen and correctly installed insulating subfloor plays a crucial role in this. It forms the basis of a sustainable floor heating system, prevents heat loss and helps to reduce heating costs. This article explains what types of subfloors exist, how to choose the right one and which steps are essential for a perfect installation.
Types of underlays for floor heating
There are different types of insulating subfloors, each with their own characteristics and benefits. The choice depends primarily on the space, the load on the floor and the desired insulation value. Below is an overview of the most used variants.
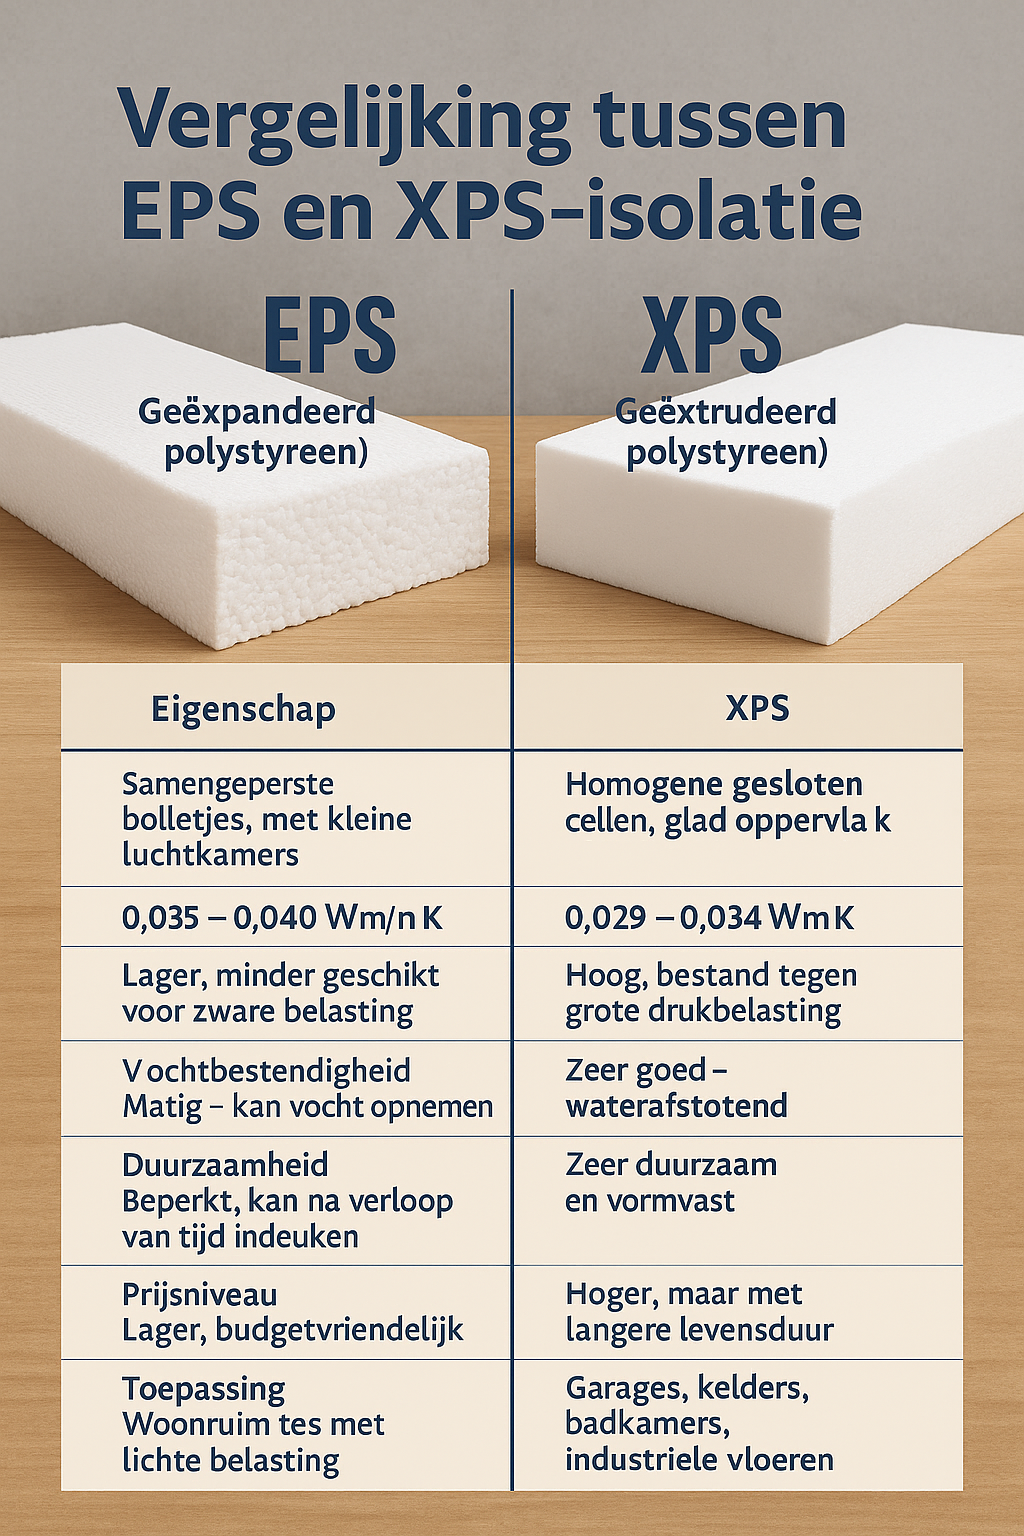
Expanded polystyrene
EPS is one of the most affordable and popular insulation materials for floor heating. It combines a decent insulation value with ease of use and a favourable price, so it is often chosen for residential applications. Below are the most important features:
- EPS is one of the most affordable and popular insulation materials for floor heating. The material offers a good balance between insulation value, ease of use and price, so it is often used in homes.
- Advantages: lightweight, easy to install, low cost and good thermal insulation.
- Disadvantages: less flameproof than XPS and susceptible to deformation under heavy loads.
- Application: particularly suitable for living areas with a light floor load and average insulation requirements.
Extruded polystyrene
XPS is denser, stronger, and more resistant to moisture than EPS. Thanks to its high compressive strength and low water absorption, it is a sustainable choice for more heavily loaded floors.
- Advantages: high pressure resistance, excellent thermal insulation, moisture resistant and durable.
- Cons: slightly higher price, but with longer life and better performance.
- Application: ideal for areas with heavy use, such as garages, cellars and bathrooms, where extra strength and moisture resistance are required.
How do you choose a subfloor?
Choosing the right subfloor is an important step that directly affects the efficiency of your floor heating system. When selecting, Bricknest recommends that you pay attention to a few key factors that determine the efficiency and durability of your installation.
Thermal insulation properties
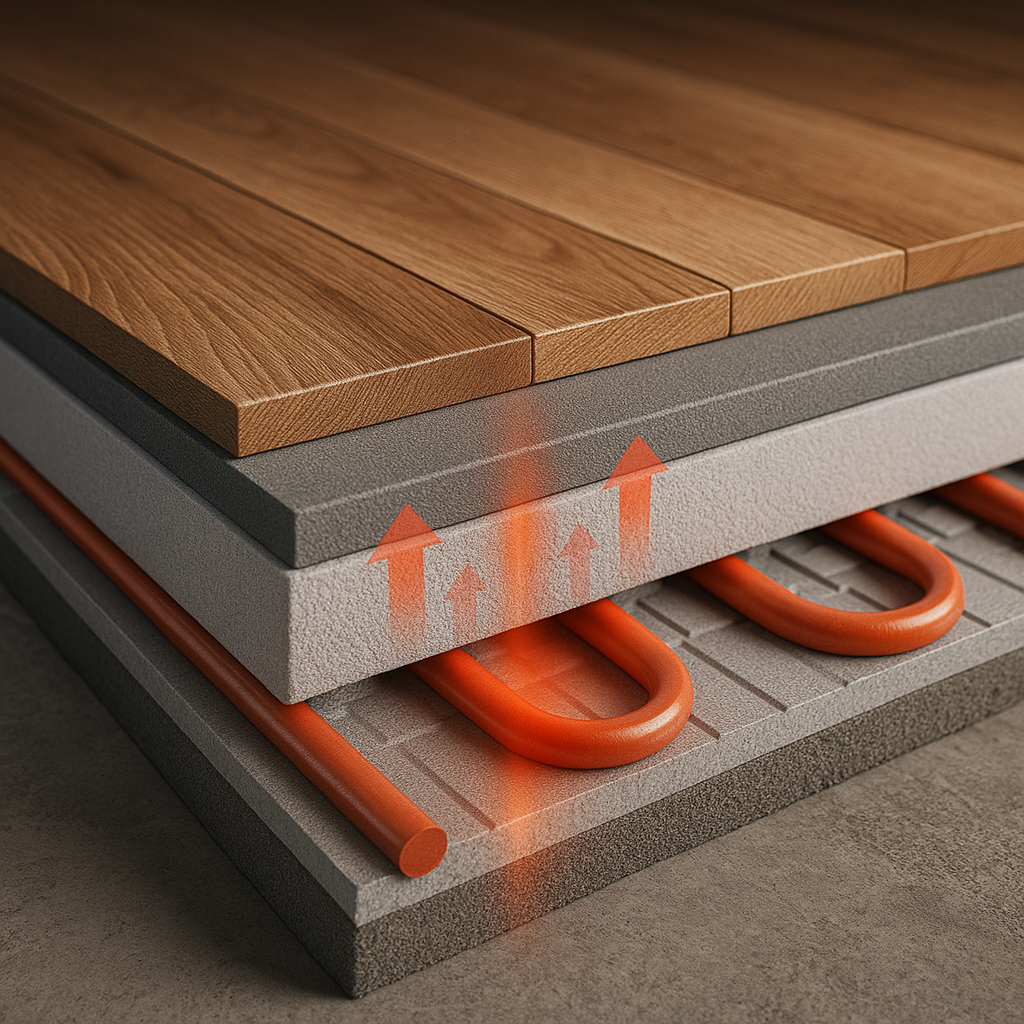
The insulation value of the material — expressed in the thermal conductivity coefficient (λ-value) — is one of the most important criteria. The lower this value, the better the subfloor retains heat and prevents loss downwards. The thickness of the insulation layer also plays a role here.
Advice from Bricknest: Choose materials with a low λ-value and a thickness that meets the manufacturer's recommendations for your floor heating system. This ensures maximum energy efficiency and uniform heat distribution.
Price and quality
The cost of the subfloor is of course an important point of attention, but a choice that is too cheap can be more expensive in the long run. Poor insulation leads to heat loss and higher energy bills.
Advice from Bricknest: invest in quality. A well-insulated subfloor pays for itself through lower heating costs and a longer lifespan of your heating system. Bricknest offers solutions in various price ranges, so you always find the best price-quality ratio.
Installation of floor insulation
A correct installation of the insulating subfloor is crucial for optimal efficiency of your floor heating system. Bricknest recommends that you work carefully and follow each step carefully to prevent heat loss and future problems.
Important steps
A successful installation starts with good preparation. Below are the most important phases that ensure a sustainable and efficient installation of your floor insulation:
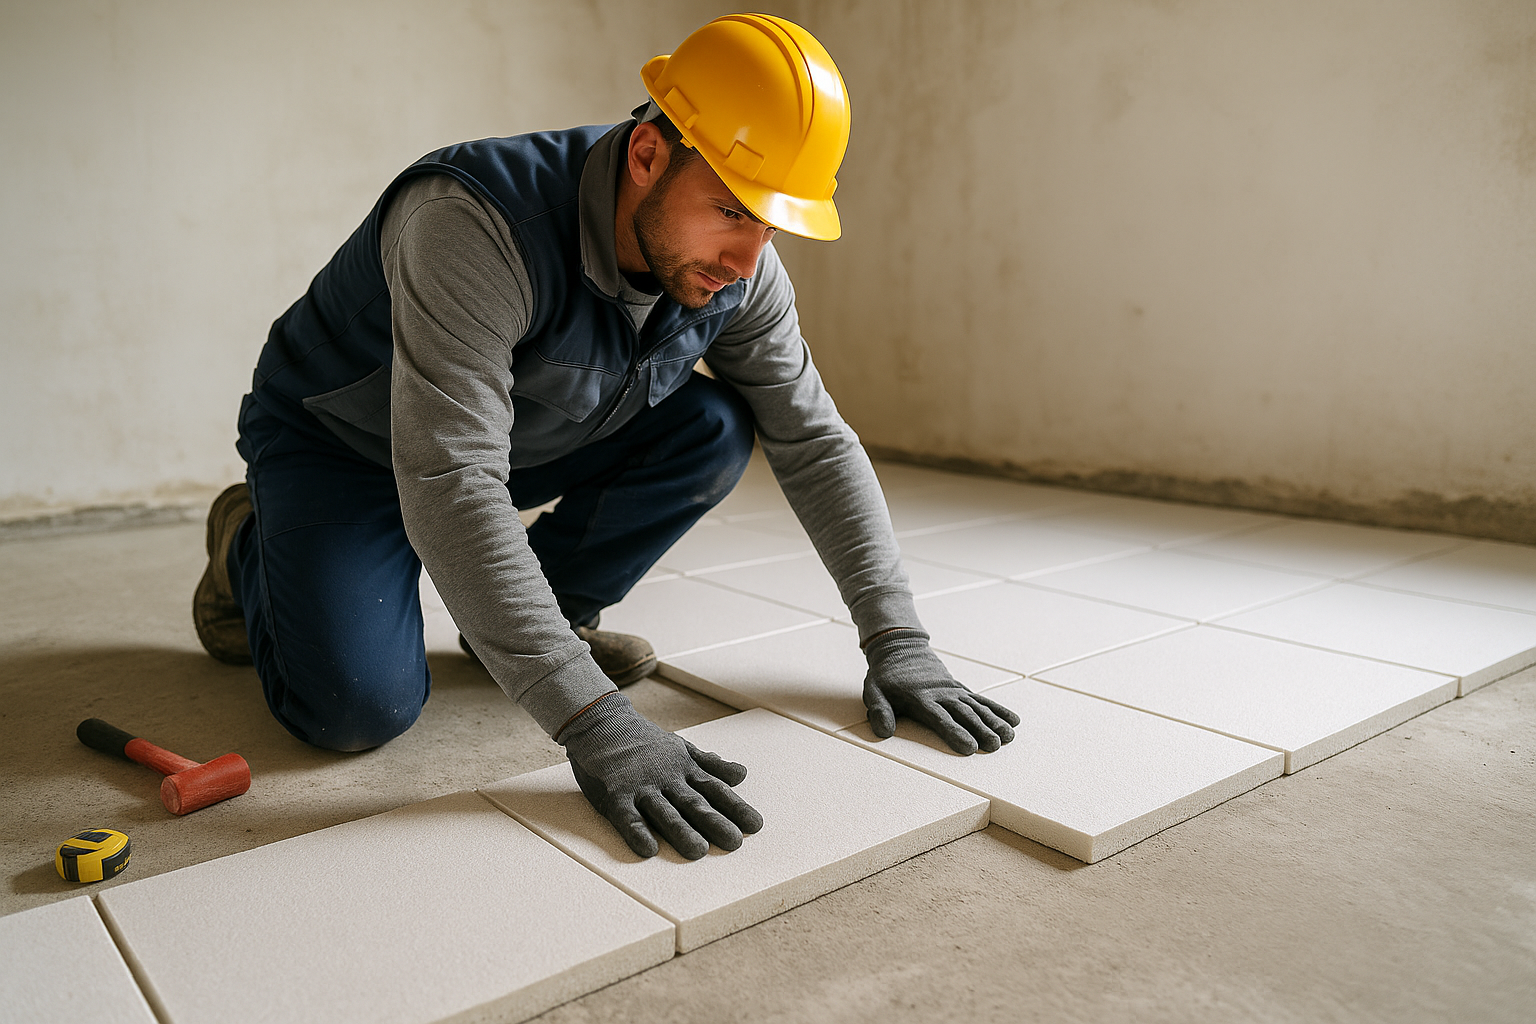
- Surface preparation: Make sure the surface is clean, flat and dry. Remove dust, dirt and any imperfections to create a stable base.
- Installation of the subfloor: Lay the insulation boards according to the manufacturer's guidelines and seal the seams carefully with tape to avoid thermal bridges.
- Installing the floor heating system: Install the heating system in accordance with the technical instructions and prevent damage to the insulation material.
- Finish: Pour out the finish floor evenly and remove air bubbles for a smooth result and optimal thermal conductivity.
Common mistakes
An incorrect installation can significantly reduce the efficiency of the system. Therefore, pay attention to the following pitfalls:
- Inadequate surface preparation: A dirty or uneven base can lead to damage and loss of heat.
- Bad fitting subfloor: Open seams cause heat loss and lower energy efficiency.
- Damage to the insulation during installation: Work carefully to avoid cracks or pressure points in the insulation.
Bricknest is happy to support you every step of the way — from advice to implementation — so that your floor heating functions efficiently, safely and sustainably. Contact our specialists for personal advice and a perfectly installed subfloor.
