
A complete bathroom renovation follows a fixed sequence: design, budget and planning, demolition, plumbing and electrical work, waterproofing, tiling, installing fixtures, and finally, the handover. There is a technical reason for this order. Everything that will eventually be hidden behind tiles must be installed and tested before the walls are finished. A leaking connection discovered only after tiling means not just a new fitting, but potentially a broken-open wall and new tiling work as well.
In this bathroom renovation step-by-step guide, you will learn which tasks are required at each stage, which regulations apply, and where things can go wrong in practice. This will help you compare quotes more effectively, evaluate technical choices, and determine when your approval is needed.
Preparation: budget and planning
Good preparation reduces the risk of delays, unforeseen costs, and changes during execution. The technical condition of the existing bathroom and the availability of materials are the primary factors in how predictably the project will proceed. It is therefore wise to finalize key decisions before the first tiles are removed.
Budget and cost structure
The costs of a new bathroom consist of three main categories. The first is labor. The second includes materials such as tiles, sanitary ware, furniture, and installation supplies. The third consists of additional work, including demolition, waste disposal, and adjustments to plumbing or electrical systems.
The latter group is easily underestimated. A damaged wooden floor joist under the shower, an old cast-iron drain that breaks during removal, or an electrical system that needs updating: such defects sometimes only become visible once the existing finishes have been removed.
Therefore, include a contingency fund for unforeseen work in your budget. Agree in advance on how additional work will be reported, estimated, and approved. Without these agreements, a relatively minor technical adjustment can lead to disputes over the final invoice.
The chosen design also affects the price. A wall-hung toilet requires a concealed cistern and a suitable support structure. Large-format tiles place higher demands on the flatness of the substrate. For a walk-in shower, it may be necessary to adjust the floor structure to create sufficient space for the drain.
How such choices impact the total budget can be found in the overview of what a full bathroom renovation costs in the Netherlands.
When comparing quotes, also pay attention to VAT. For regular tiling, plumbing, and the supply of sanitary ware, the general rate of 21% usually applies. For certain work on homes older than two years, the reduced rate of 9% may apply, including painting, plastering, wallpapering, and the installation of insulation.
For insulation work, the reduced rate applies to the eligible labor costs, not to the insulation material itself. For painting and plastering, certain materials used may also fall under the reduced rate, provided the applicable conditions are met.
Ask the contractor to specify work with different VAT rates separately. This allows you to verify which costs are included in the quote.
Planning and lead time
A complete bathroom renovation can take approximately two to four weeks of execution time for a relatively straightforward project. This is an indication, not a fixed deadline. The actual duration depends on factors such as the scope of demolition, the condition of the substrate, the plumbing, and the required drying and curing times.
The total project duration may be longer because sanitary ware, tiles, or custom furniture often need to be ordered in advance. A missing concealed cistern or a shower drain with non-standard connection dimensions can delay multiple tasks.
Execution generally follows these five phases:
- Demolition of existing tiles, sanitary ware, and installations that are being replaced.
- Adjusting water pipes, drains, and electrical wiring, followed by repairing the substrate.
- Applying waterproofing to the floor and in wet zones.
- Laying tiles, grouting, and preparing for the final finish.
- Installing sanitary ware, furniture, and lighting, followed by sealing, technical inspection, and handover.
Mandatory curing times may occur between these phases. A new screed, leveling layer, or waterproofing system must dry or cure sufficiently before the next step begins. The required time depends on the product, layer thickness, temperature, and humidity.
If tiling is done too early, residual moisture can affect the adhesion of materials. This increases the risk of damage or the finish coming loose.
If you do not have a second shower or bathroom, discuss what temporary facilities are possible and how long the room will be out of use before starting.

Regulations: permits, homeowners' associations (VvE), asbestos, and lead
Replacing sanitary ware and tiling within an existing bathroom generally does not require an environmental permit. That does not mean every internal renovation is automatically exempt from permits. The nature of the work, the building's construction, and any special protection rules may entail additional obligations.
Check in advance whether any of these situations apply:
- Structural changes. Are you planning to remove a potentially load-bearing wall, modify a floor structure, or expand the bathroom? Check the Omgevingsloket (Environment Desk) to see if a permit or notification is required.
- Apartment with a homeowners' association (VvE). Work on communal pipes, main stacks, structures, or certain floor components may require permission based on the deed of division and the division regulations.
- Homes built before 1994. In older buildings, asbestos-containing materials may be present, for example in certain floor finishes, panels, or pipes. Suspected material must be tested before work begins.
- Old water pipes. Lead drinking water pipes may still be present, especially in older homes. If these are found, replacement must be investigated and coordinated with the responsible party.
Specific regulations apply to the removal of asbestos. Private individuals may only remove certain types under strict conditions. Factors such as the material type, method of attachment, surface area, and a mandatory notification may be decisive.
Therefore, do not assume that old flooring or paneling can be removed safely without a prior assessment.
With lead drinking water pipes, replacement is important due to the potential release of lead into the drinking water. Which party is responsible depends on the specific section of the pipe.
When plans go beyond replacing existing components, it is wise to check in advance when a renovation in the Netherlands requires a permit.
Design and layout
A functional bathroom starts with the available space and existing connection points. The position of drain pipes and the main stack determines how much flexibility you have to relocate the toilet, shower, or washbasin.
The floor construction, the location of ventilation ducts, and the available wall thickness can also impact the design.
Layout and dimensions
Measure the space accurately and draw a floor plan to scale. Include the door, windows, radiator, pipe ducts, and existing sanitary connections.
Next, check whether the chosen layout leaves enough room to move around. Pay attention to the swing direction of doors and shower screens, the accessibility of furniture, and the space around the toilet and washbasin.
The Building Environment Decree (Bbl) contains minimum dimensions for certain bathroom and toilet areas in new construction. For a prescribed combined bathroom and toilet area, the relevant new construction provision requires a floor area of at least 2.2 m² and a width of at least 0.9 m.
These new construction requirements cannot automatically be applied as mandatory minimum dimensions for every existing bathroom. During renovation, it must be determined which quality level applies to the specific work being performed.
Relocating a toilet can have significant technical consequences. The toilet drain has a relatively large diameter and must be connected to the sewer system with an appropriate slope. There is not always enough space for this in an existing concrete floor.
A raised floor or a modified stud wall may be necessary. Both solutions affect the available space and the total costs.
When moving a shower, the floor build-up height is the primary factor. A walk-in shower requires space for the drain, waterproofing, and the necessary slope toward the shower channel or floor drain.
Materials, sanitary ware, and storage
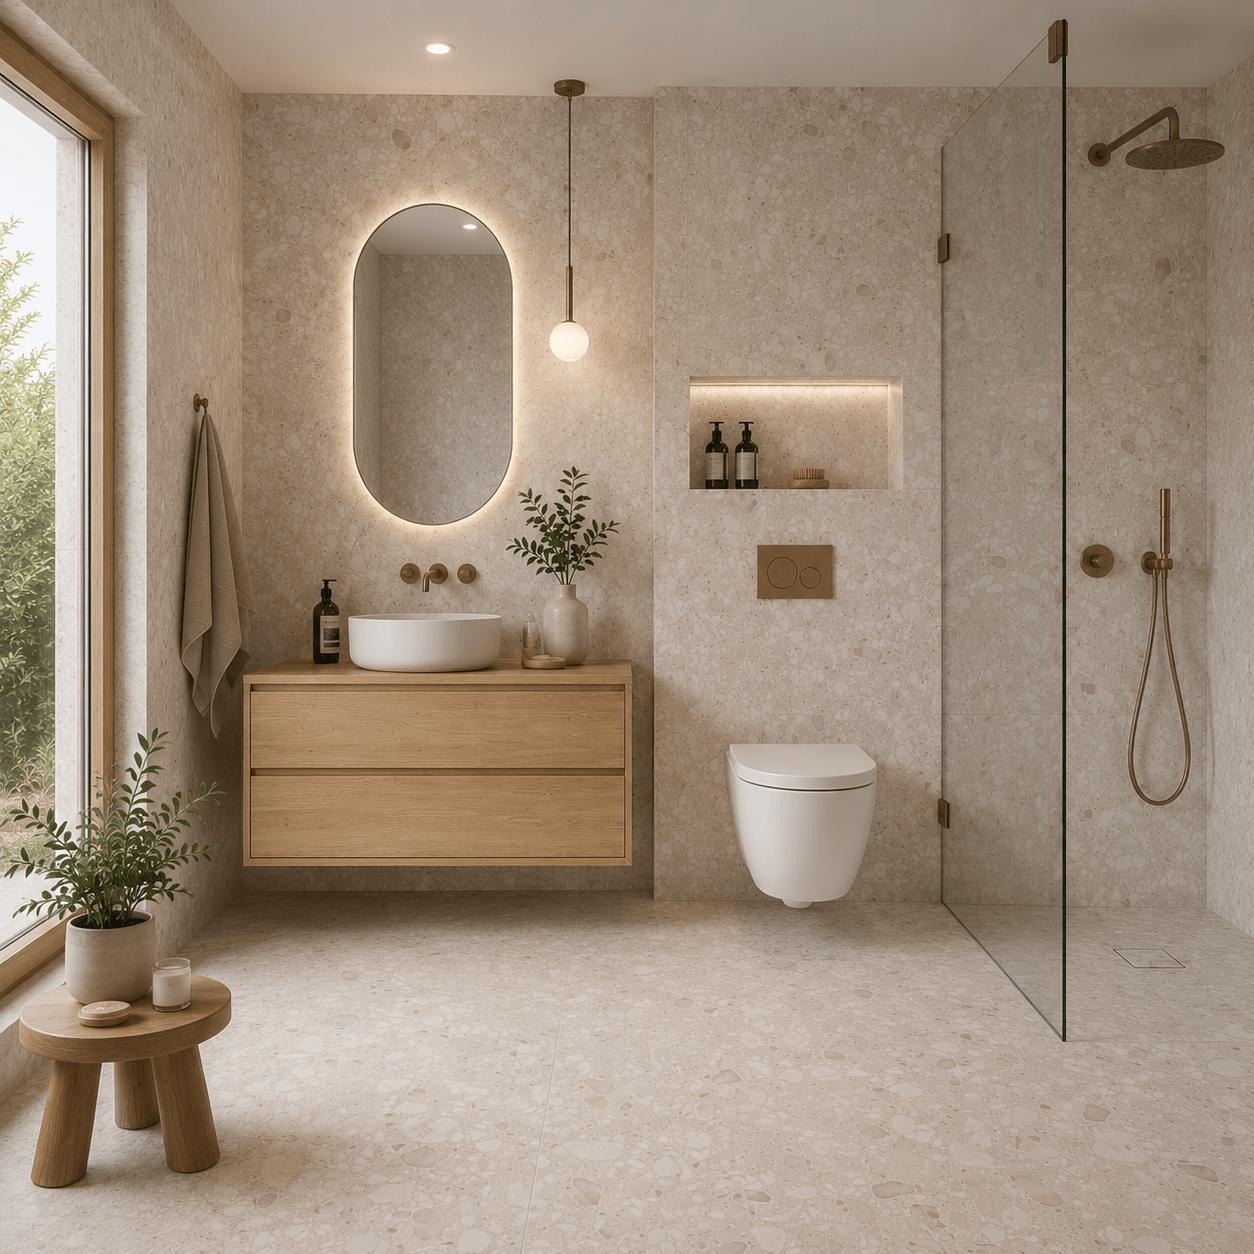
Do not choose materials based solely on color and appearance. In a bathroom, water exposure, maintenance, slip resistance, and suitability for the substrate are just as important.
Ceramic tiles with low water absorption are generally easy to maintain and suitable for damp rooms. Some types of natural stone and mineral finishes are more sensitive to moisture or dirt. Whether a protective layer or impregnating agent is needed depends on the material and the manufacturer's instructions.
Slip resistance is important for shower floors. Manufacturers use various test methods and classifications for this. For wet surfaces where people walk barefoot, a classification according to groups A, B, and C can be used, for example. Which version is appropriate depends on the application and the expected use.
Include storage space in the design from the start. A niche in the shower wall must be prepared before applying the waterproofing. The connections around the niche require extra attention, as water can collect on horizontal surfaces.
Wall-mounted furniture keeps the floor clear and makes cleaning easier. However, it must be attached to a wall or support structure capable of bearing the weight of the furniture and its contents.
Additional reinforcement may be necessary for lightweight partition walls.
Demolition and preparation of the substrate
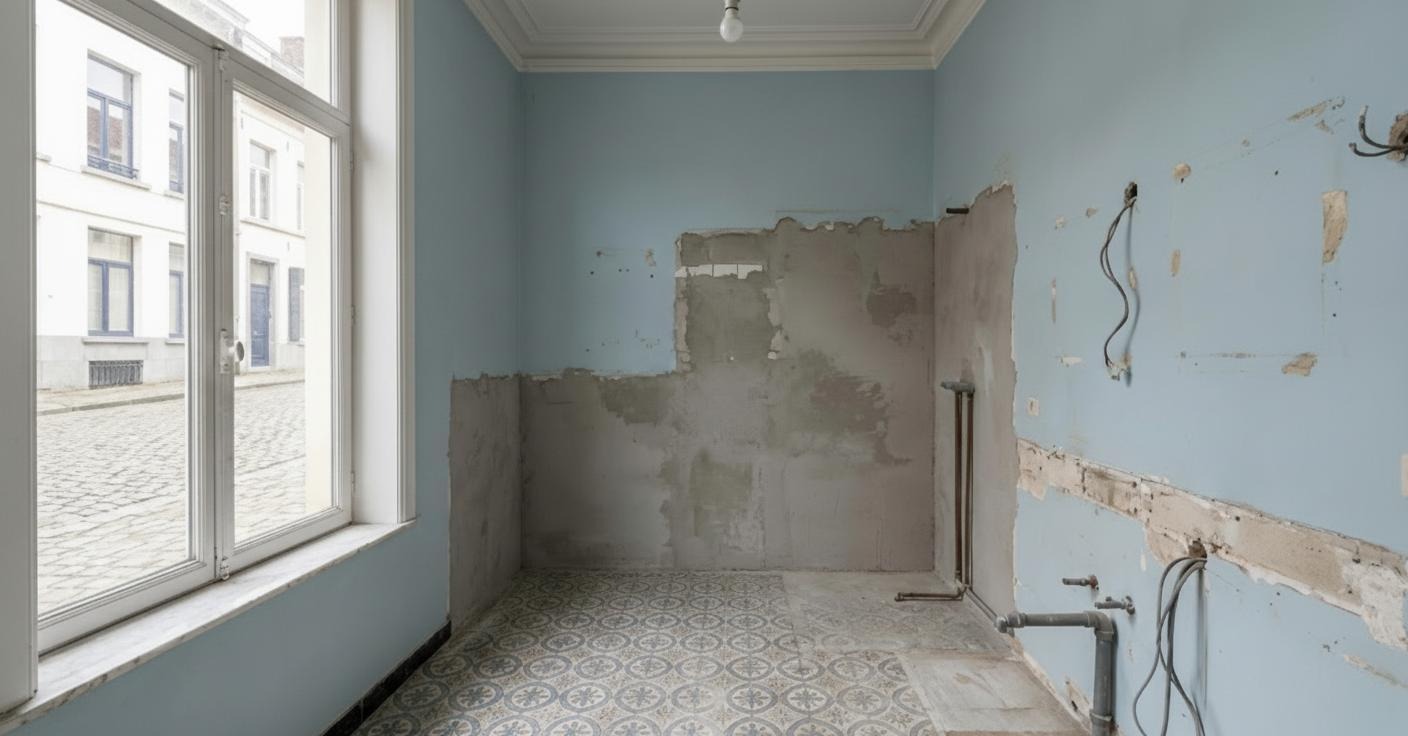
Before demolition, the water supply is shut off and the relevant electrical installations are safely de-energized. Next, the existing tiles, sanitary ware, and any components requiring replacement are removed.
Dismantling must be carried out in a controlled manner to ensure that existing pipes and structures are not accidentally damaged. This phase is also important for identifying hidden defects.
What is revealed during demolition
The true condition of the substrate can only be properly assessed after the finish has been removed.
Behind old tiles, you may find damp walls, damaged pipe connections, or insufficiently sturdy panel materials. In the case of wooden floors, affected sections may become visible. Outdated drain pipes or previous careless repairs may also come to light.
This is the moment to determine which components need to be repaired or replaced.
A new tile finish applied to a damp, unstable, or insufficiently load-bearing substrate can later crack, warp, or come loose. This may make it necessary to break open part of the bathroom again.
Therefore, have any irregularities documented with photos and ask for a clear description of the repairs and associated costs before any additional work is performed.
A flat and stable substrate
The quality of tiling and waterproofing depends heavily on the underlying structure.
Walls must be sufficiently flat, stable, and suitable for the chosen finishing system. Damaged or loose sections are removed or repaired.
For wooden floors, the rigidity of the structure is important. Excessive deflection can cause stress in the tile finish and the joints between different building components.
For a walk-in shower, the slope towards the drain is prepared during this phase. This can be done, for example, with a suitable screed or a prefabricated shower floor element.
The required slope must be aligned with the drainage system, the floor structure, and the manufacturer's specifications. An insufficient slope can cause water to pool on parts of the shower floor.
Piping, electrical, and heating
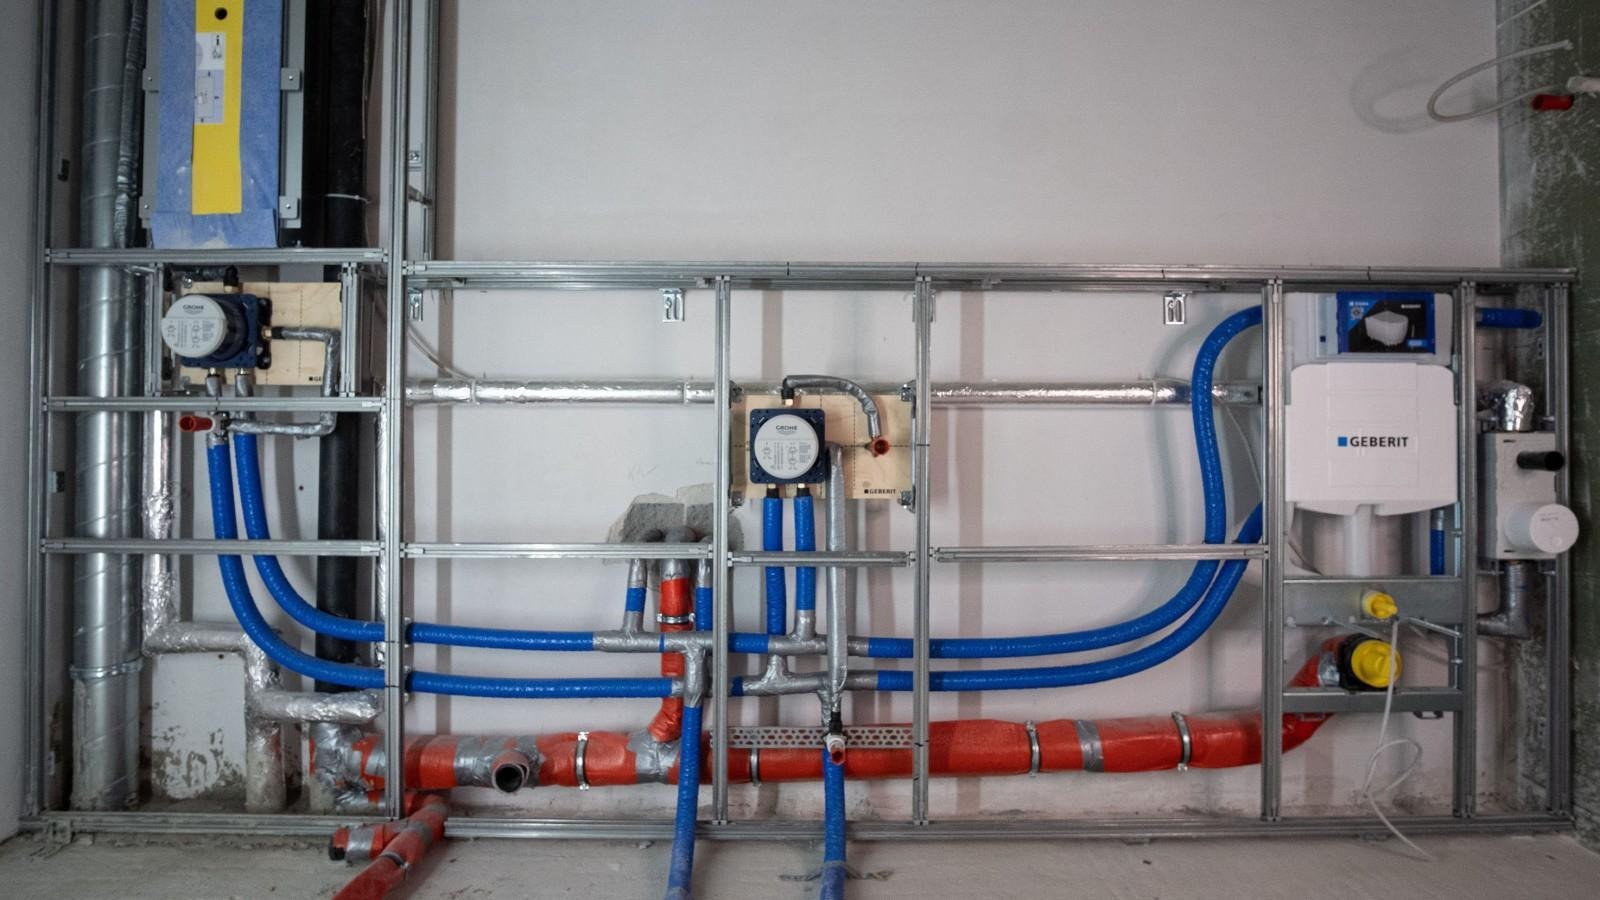
During this phase, installations are laid that will later be partially or completely hidden behind the finish. This is precisely why inspection and documentation are important before closing up walls and floors.
Water and drainage
New water pipes and drains are installed according to the final design. Built-in parts for faucets and the cistern for a wall-mounted toilet are also installed during this phase.
When installing, factors such as pipe diameters, fastening, material compatibility, and the accessibility of maintenance-sensitive components must be taken into account.
Drain pipes must have sufficient capacity and an appropriate slope. Chasing pipes into load-bearing walls or floors without a structural assessment can affect the safety of the building.
Before pipes are concealed, they must be checked in accordance with the applicable installation regulations. For water pipes, a pressure or leak test may be required.
A leaking connection is much easier to repair at this stage than after the wall has been tiled.
Take photos of hidden pipes and record key distances to fixed reference points. This information will be useful later for maintenance or when attaching accessories.
Electricity: zones and safety
Electrical installations in bathrooms are subject to special safety regulations due to the presence of water and the increased risk of contact with conductive surfaces.
NEN 1010 is the primary Dutch standard for low-voltage installations. The published edition, NEN 1010:2020+C1:2024, contains regulations for safe electrical installations, including specific provisions for rooms containing a bath or shower.
The area around a bath and shower is divided into zones. Each zone has specific requirements for the placement and design of electrical equipment.
The precise dimensions of these zones depend on factors such as the design of the shower, the presence of a shower tray, and any fixed partition walls.
Therefore, it is not possible to determine where a socket, switch, or fixture can be safely placed based on a single general distance.
When modifying or extending an electrical installation, the installer must verify which residual current device (RCD) protection is required by the applicable regulations. For new final circuits, additional protection with an RCD of no more than 30 mA is generally required.
The required degree of protection (IP rating) for fixtures also depends on the mounting location.
Have the installation carried out and checked by a qualified electrical contractor. In older homes, it may be necessary to upgrade the consumer unit.
Heating
A towel radiator, hydronic underfloor heating, and electric underfloor heating each have different technical characteristics.
A towel radiator can be connected to an existing heating system, provided the available capacity is sufficient for the room. Keeping towels dry does not automatically mean the radiator will also cover the entire heating demand of the bathroom.
Hydronic underfloor heating distributes heat over a larger floor area, but requires space for pipes and the floor build-up. During renovations, this can affect threshold heights and the position of the shower drain.
Electric underfloor heating often has a lower build-up height, but energy consumption and the electrical connection must be taken into account during the design phase.
Determine the heating system before finalizing the floor structure. Changing it later may mean the floor has to be adjusted again.
Waterproofing: the layer you don't see
Tiles and grout do not provide a complete guarantee against water penetration. Moisture can reach the underlying materials, especially through joints, structural movement, and damaged grout.
Therefore, protection against water must be designed as a separate component of the bathroom construction.
Law, manufacturer, and building practice
When it comes to waterproofing, it is important to distinguish between minimum legal requirements, product specifications, and additional measures that are standard in building practice.
According to the Bbl (Building Decree), existing bathroom areas are subject to requirements regarding the water absorption of the entire floor and specific parts of walls, frames, and doors up to a height of 1 meter.
This is not the same as an obligation to apply exactly one meter of waterproofing membrane to every bathroom wall. The technical execution must meet the applicable performance requirements.
During renovations, the quality level required by the Bbl for the specific work must also be taken into account.
In practice, the direct shower area is usually protected against water over a larger surface area, as the walls there are regularly exposed to running and splashing water.
The required height and the appropriate sealing solution depend on the shower layout, the substrate, and the chosen system.
How waterproofing works in practice
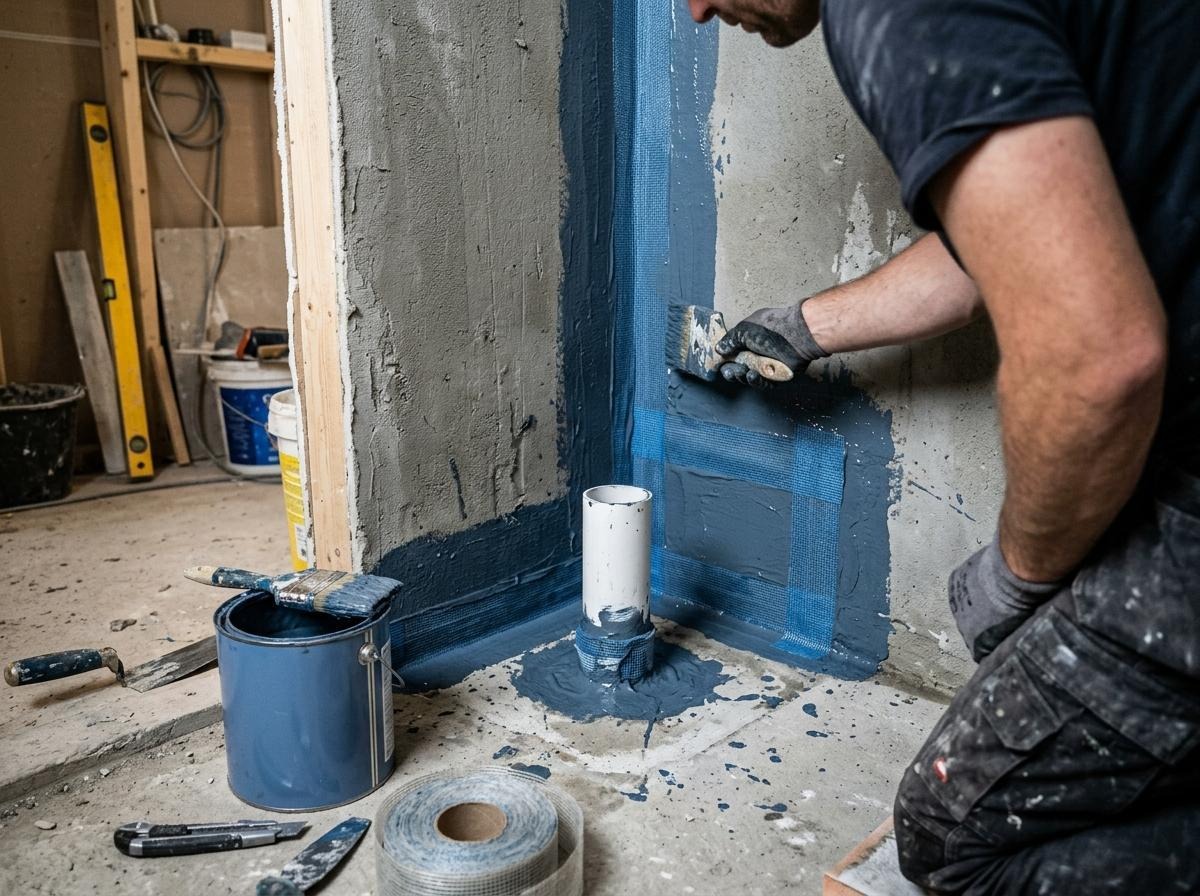
Liquid sealants or sheet membranes can be used for waterproofing. It is important that the individual components are compatible with one another.
Transitions between floor and wall and connections between different wall sections are finished with suitable sealing tapes. Appropriate collars or other system components are used around pipe penetrations and connections to the shower drain or floor drain.
These connections are particularly sensitive, as minor movements or incomplete seals can provide a path for water.
Apply the sealant according to the required layer thickness and application method. Drying and curing times must comply with the manufacturer's technical documentation.
At Bricknest, a dedicated project manager coordinates the sequential tasks. This allows hidden installations and waterproofing layers to be inspected before the final finish is applied.
Inspection points before tiling
Before the tiler begins, the hidden work must be sufficiently inspected and documented.
Three important inspection points are:
- The water pipes and built-in components have been correctly positioned and tested in accordance with the applicable regulations.
- The waterproofing layer has been applied continuously, with suitable solutions for corners, penetrations, and drain connections.
- The floor structure and the slope have been checked before the final tile finish is applied.
Additional waterproofing tests depend on the system used and the prescribed test method. A newly applied seal should not be subjected to water without authorization from the manufacturer.
Keep photos of the inspected components. They may be helpful later for maintenance, renovations, or investigating potential moisture issues.
Tiling and grouting
Tiling largely determines the look of the bathroom. However, its technical quality depends primarily on the substrate, the materials chosen, and the finishing of the connections.
Layout plan and execution
A tiler begins with a layout plan that determines the tile arrangement, grout widths, and necessary cutouts.
This helps minimize narrow tile strips in prominent areas. At the same time, connections to sanitary fixtures and the position of the drain must be taken into account.
Large-format tiles require a particularly flat substrate and a suitable bonding method. If there is insufficient adhesive contact, parts of the tile may not be properly supported.
In a walk-in shower, the tiling must follow the slope toward the drain. On a floor with a multi-directional slope, large tiles can be difficult to install.
Smaller tiles or a properly positioned shower channel can make it easier to achieve the required slope. The final choice depends on the drain configuration and the floor construction.
Grout and sealant joints
Standard tile grout and elastic sealant joints serve different functions.
Grout fills the space between the tiles. Elastic sealant is used in places where movement between building components or materials needs to be accommodated.
This is relevant, for example, at connections between floor and wall, between two walls, and along certain sanitary components.
A rigid joint at a movement-sensitive connection can crack. A suitable elastic joint can better accommodate movement, but it is not a substitute for the underlying waterproofing.
Sealant joints require maintenance. Their lifespan depends on the material, the load, the substrate, and the maintenance. Damaged or loose sealant must be replaced in a timely manner.

Installing sanitary fixtures
Once the tiling has sufficiently cured, the sanitary fixtures are installed and connected. Since many built-in components were installed earlier, this phase focuses primarily on correct final assembly, fastening, and inspection.
Shower and bath
A shower screen must be securely fastened to a suitable structure. When creating attachment points in wet zones, care must be taken to avoid damaging the waterproofing.
Where drilling is necessary, holes must be sealed according to the system's technical specifications. Whenever possible, choose a mounting solution that avoids critical areas of the waterproofing.
For a bathtub, the support must be capable of bearing the weight of the tub, the water, and the user. Insufficient support can cause movement, which puts stress on connections and sealant joints.
Ensure that the siphon and other maintenance-sensitive connections remain accessible.
After installation, the functionality of the drain and the connections is tested.
Toilet and washbasin
A wall-hung toilet is attached to a suitable installation frame. The mounting height should be adjusted to suit the users and the system's adjustment options.
For a floor-mounted toilet, a stable attachment and a reliable connection to the sewer system are essential.
The height of the washbasin should also be appropriate for daily use. Check in advance that the vanity unit provides sufficient space for the siphon and water connections.
For heavy washbasins and wall-mounted furniture, the wall construction must be suitable for the load.
After installation, test the faucets, drains, and flushing mechanisms. Check all connections for leaks and ensure that the water drains away without any issues.
Ventilation and lighting
A significant amount of water vapor is released while showering. If this is not adequately removed, moisture can condense on cold surfaces. Prolonged exposure to moisture increases the risk of mold growth and damage to finishing materials.
A proper ventilation system and a well-thought-out lighting plan should therefore be incorporated during the design phase.
Ventilation according to requirements
The Bbl (Building Decree) stipulates a minimum ventilation capacity of 14 dm³/s, or 50.4 m³/hour, for existing bathrooms. For separate toilet rooms, the requirement is 7 dm³/s. In a combined room, the 14 dm³/s requirement applies.
During renovations, it must be verified which quality level applies, depending on factors such as the nature of the work being performed on the ventilation system.
Exhaust air must be vented to the outside via a suitable system. Additionally, sufficient replacement air must be able to flow in.
A fan can only deliver its rated capacity if the entire air duct system is suitable. The resistance of ducts, bends, and grilles can reduce the effective airflow.
The position of the extraction point and the air supply also affects air distribution. If placed unfavorably, some air may be extracted directly without sufficiently reaching the humid zones.
A humidity-controlled fan or an overrun timer can help continue extraction after showering. The choice should suit the existing ventilation system and the characteristics of the room.
Lighting
Combine general lighting with task lighting at the vanity or mirror. This ensures good visibility for daily grooming without annoying shadows.
Electrical fixtures must be suitable for their installation location. Especially near the bath and shower, zone classification according to applicable regulations is important.
Plan the position of light points, switches, and any mirrors with integrated lighting before the electrical installation is carried out.
An additional connection after tiling may mean that finished walls have to be opened up again.
Completion and maintenance
The bathroom renovation is only complete once the work performed has been inspected and any defects have been recorded.
A proper handover consists of more than just a visual assessment. The operation of installations, water drainage, and the finishing of connections must also be tested.
What to look for during the handover
Walk through the bathroom with the contractor and compare the result with the quote, drawings, and agreed-upon materials.
A practical handover inspection includes the following six points:
- The shower floor drains water toward the drain without unwanted pooling.
- Faucets, the shower, the toilet, and visible pipe connections function without leaks.
- Sealant joints and grout lines are finished correctly and show no gaps or damage.
- The tiling is stable, sufficiently level, and free of visible cracks or loose parts.
- Ventilation, lighting, and heating function according to the agreements made.
- Manuals, warranty terms, relevant test results, and maintenance instructions have been handed over.
A hollow sound when tapping a tile is not always sufficient evidence of a defect on its own. If in doubt, the adhesion or stability of the tiling should be investigated further.
Record any snagging items in writing, preferably with photos. Agree on which repairs are necessary and when they will be carried out.
More information on assessing work and documenting defects can be found in the article on quality control and handover during renovation.
Bricknest provides a detailed quote that breaks down the work, materials, and labor costs. According to the information on their website, you will receive this within seven days of your free consultation.
Maintenance after renovation
Even a technically well-executed bathroom requires regular maintenance.
Leave the ventilation running long enough after showering to remove humid air. The time required depends on the ventilation capacity, air supply, and moisture load. A mirror clearing up is not a reliable indicator of the total humidity in the room.
Clean ventilation grilles and accessible parts according to the maintenance instructions. Regularly check the drain for accumulations of hair, soap residue, and other debris.
Inspect sealant joints for cracks, detachment, or mold. Damaged sealant must be replaced, but if moisture problems persist, you should also investigate whether the underlying structure is adequately protected.
Use cleaning agents suitable for the specific finish. Not every tile or grout requires a sealant. Natural stone and special mineral surfaces, in particular, may have their own maintenance requirements.
Frequently asked questions
When planning a bathroom renovation, questions often arise about the feasibility of a new layout and the impact on daily use. The answers depend on the existing structure and the work being performed.
Can I move the bathroom to a different room?
That is technically possible, but it requires a more extensive assessment than simply renovating an existing bathroom.
The new room must be fitted with suitable water supply and drainage pipes. Connecting a toilet, in particular, can present limitations due to the required pipe diameter and the necessary slope.
In addition, the floor structure, waterproofing, ventilation, and electrical installation must all be suitable for the new function.
In apartment buildings, homeowners' association (VvE) rules and shared utility systems may also play a role.
Can I stay in my home during the renovation?
In many cases, yes. The practical feasibility mainly depends on the availability of a second toilet or shower and the scope of the work.
Dust and noise can cause disruption during demolition. The water supply may also be temporarily shut off.
If the home has only one bathroom, it is wise to arrange a temporary solution in advance and make clear agreements regarding the period during which the space will be unavailable.
Which tasks can I carry out myself?
Some preparatory or finishing work can be carried out by the owner, provided it is done safely and the necessary knowledge is present.
Think, for example, of removing simple, non-hazardous finishes or painting work for which the surface and conditions are suitable.
Work on electrical installations, water pipes, and complex waterproofing systems requires specific professional expertise. Errors can remain hidden until leaks, moisture damage, or safety issues arise.
Therefore, establish in advance which tasks you will perform yourself and which fall under the contractor's responsibility. Also, agree on how self-performed work will be inspected and which warranty conditions apply.

