Laminate has been one of the most popular flooring solutions in Dutch housing for decades. This popularity is not without reason: modern laminate floors combine the warm look of real wood with the durability of plastic. However, the quality of the floor depends on the technical implementation of the installation. A floor that has not been laid correctly can crack, bulge or wear out prematurely. At Bricknest, we approach each floor as a technical system where the interaction between the substrate, the insulation layer and the top layer must be perfectly balanced to guarantee optimal home comfort and longevity.
Substrate pre-treatment
The basis of any sustainable floor lies literally beneath the surface. Before you can start actually laying laminate, the structural condition of the screed - whether it is a sand-cement screed, anhydrite or a wooden construction floor - must be thoroughly analyzed. Improper pre-treatment irrevocably leads to aesthetic and structural defects in the finishing phase.
Removing imperfections and dust
An absolutely flat surface is essential for the stability of the laminate's click system. Even small grains of sand or leftover glue from a previous floor covering can lead to annoying tapping noises while walking. Our specialists use industrial vacuum cleaners and scraping tools to make the floor completely “broom free” and clean. In addition, we check the flatness with a sieve; a deviation of more than 2 mm over a length of one meter is technically unacceptable and must be corrected immediately to prevent stress on the connections.
Priming and leveling
If the surface has too large differences in height, equalization is necessary. By applying a specific primer, the suction power of the subfloor is neutralized, which guarantees optimal adhesion of the leveling compound. This process provides a mirror-smooth surface that forms the perfect basis for insulation and laminate. At Bricknest, we also recommend that you always measure moisture when building a new building (carbide method), because residual moisture in the screed can cause the HDF core of the laminate to swell irreparably.
Laying laminate
The laminate installation process requires not only dexterity, but also an understanding of the thermodynamic properties of the material. Laminate works under the influence of humidity and temperature, which means that the floor must have space to expand and contract without touching the walls.
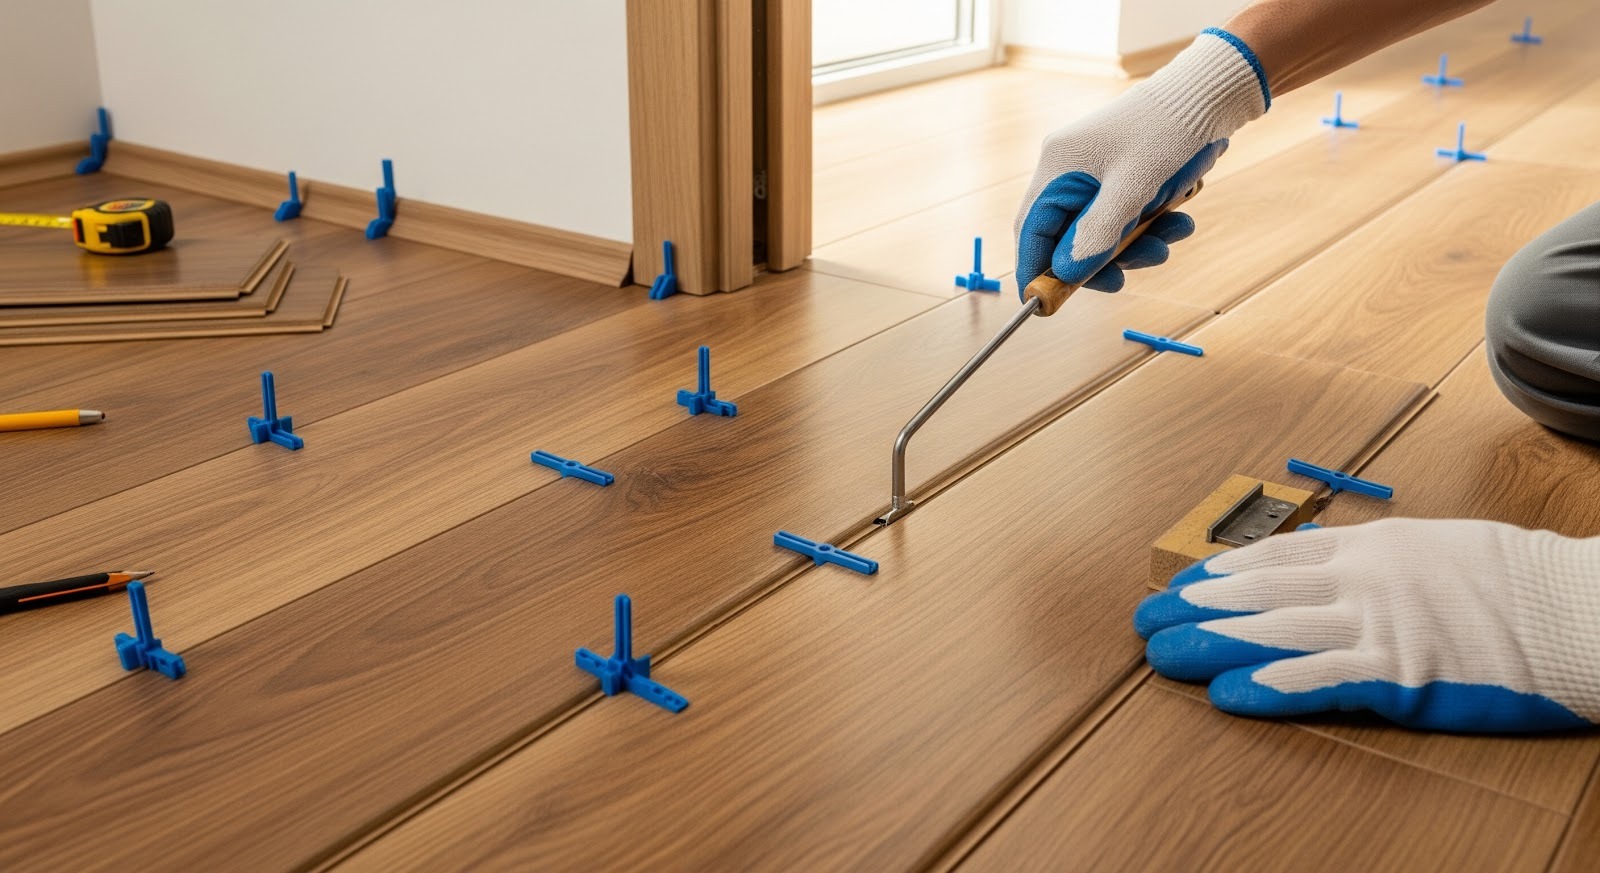
Professional mounting methods
When laying laminate, we use a strict laying protocol where the panels must acclimatize in the room for at least 48 hours. During assembly, we maintain an expansion joint of 10 to 15 mm around all fixed objects and walls. We use professional stop blocks and pull irons to seamlessly interlock the ends without damaging the vulnerable spring and groove connection. By placing the panels in a “wild bandage” or “half brick”, with the end joints staggered by at least 30 cm, we create a constructively strong disc that cannot slide apart.
Tips for a flat and firm floor
One of the most important laminate laying tips is controlling the laying direction in relation to the incidence of light. By placing the planks in the direction of the main light source, the seams are less noticeable and the space looks larger.
In addition, there are technical aspects that are often overlooked:
- Checking each board for production errors before it is clicked on.
- The use of spacers that do not move while tapping.
- The installation of transition profiles at doorways to make the floor 'work' per room.
- The correct shortening of door frames so that the laminate can run underneath them for a sleek finish.
These details ensure that the floor is still rock solid not only immediately after delivery, but also after years of intensive use.
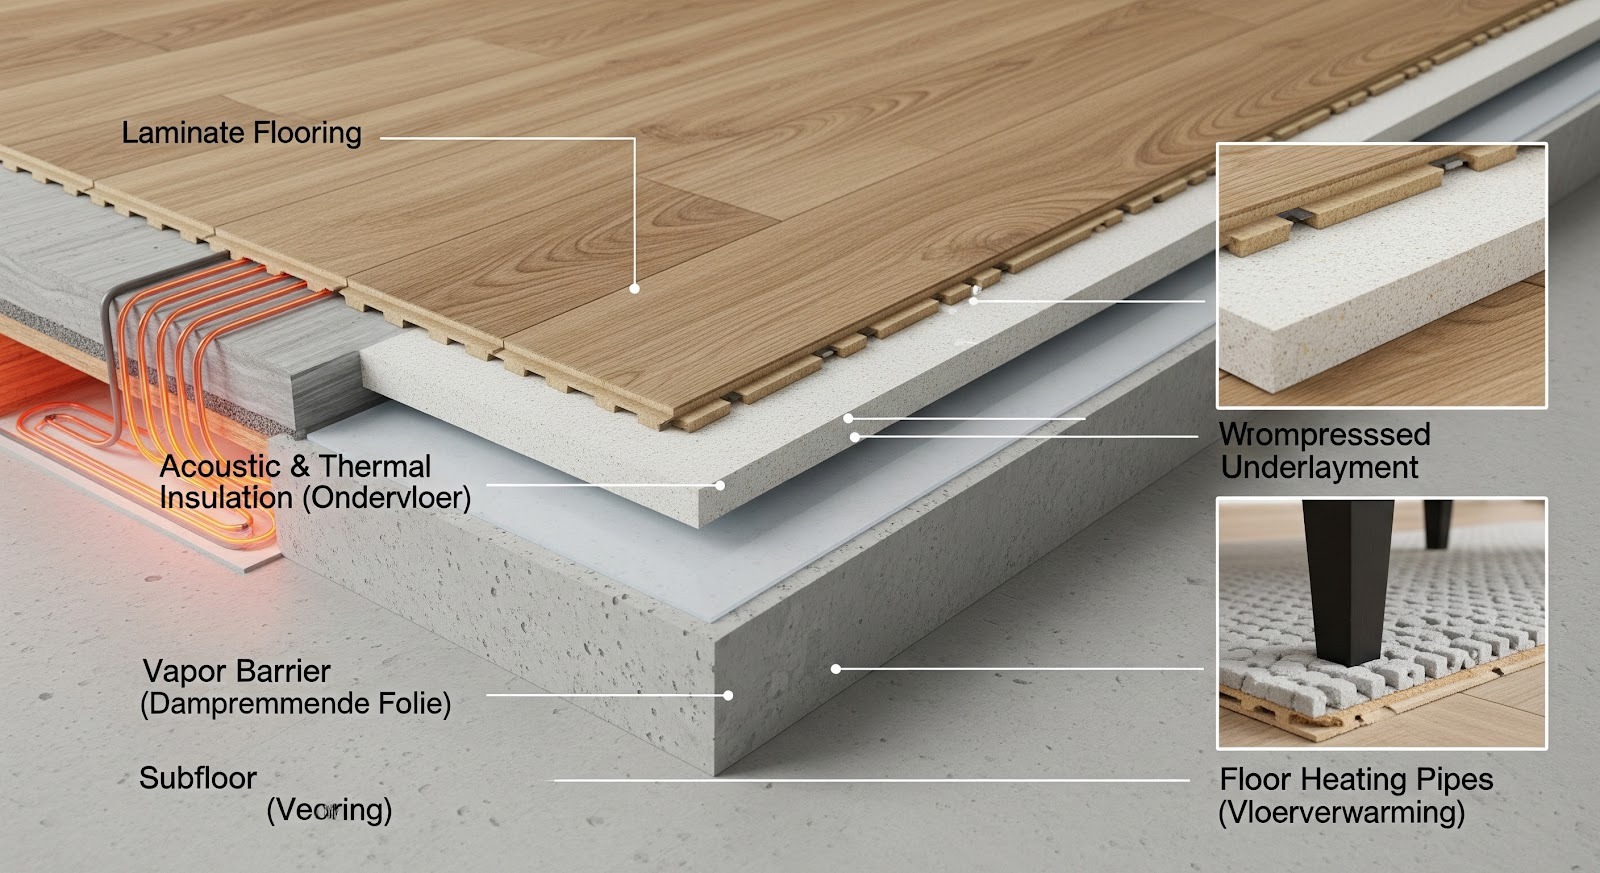
Thermal and acoustic insulation
From a technical point of view, the choice of the subfloor is at least as important as the laminate itself. The insulation layer fulfills several functions: it smoothes out minor imperfections, stops the cold and reduces walking noise to the rooms below.
Heat and sound insulation
The insulation for laminate should be chosen based on the specific requirements of the home. In apartments, a 10dB impact noise reduction is often required by law (according to Dutch standards). We install high-density subfloors that minimize both reflective noise (in the room itself) and transmission noise (to neighbors). However, when you aim for maximum thermal efficiency, the combination with a heat source under the floor is an excellent option. For an in-depth technical comparison, please refer to our guide on floor heating, explaining how laminate and heating systems work efficiently together.
Extending the life of the floor
A good subfloor protects the laminate against the constant pressure load of furniture and walking traffic. Without a high-quality laminate insulation, the click joints would bend slightly with each step, which over time leads to metal fatigue of the plastic joint and ultimately to open seams. In addition, the insulation acts as a moisture barrier (vapor barrier film) that prevents rising moisture from the crawl space from affecting the floor from below. Bricknest selects subfloors that retain their resilience even after years of stress, which is essential to maintaining your warranty.
Lacquers and finishes
Once the floor is in place, the finishing phase follows, which determines the aesthetics and practicality. Although laminate is a finished product, there are specific treatments and edge finishes that increase durability in critical areas.
Decorative effects options
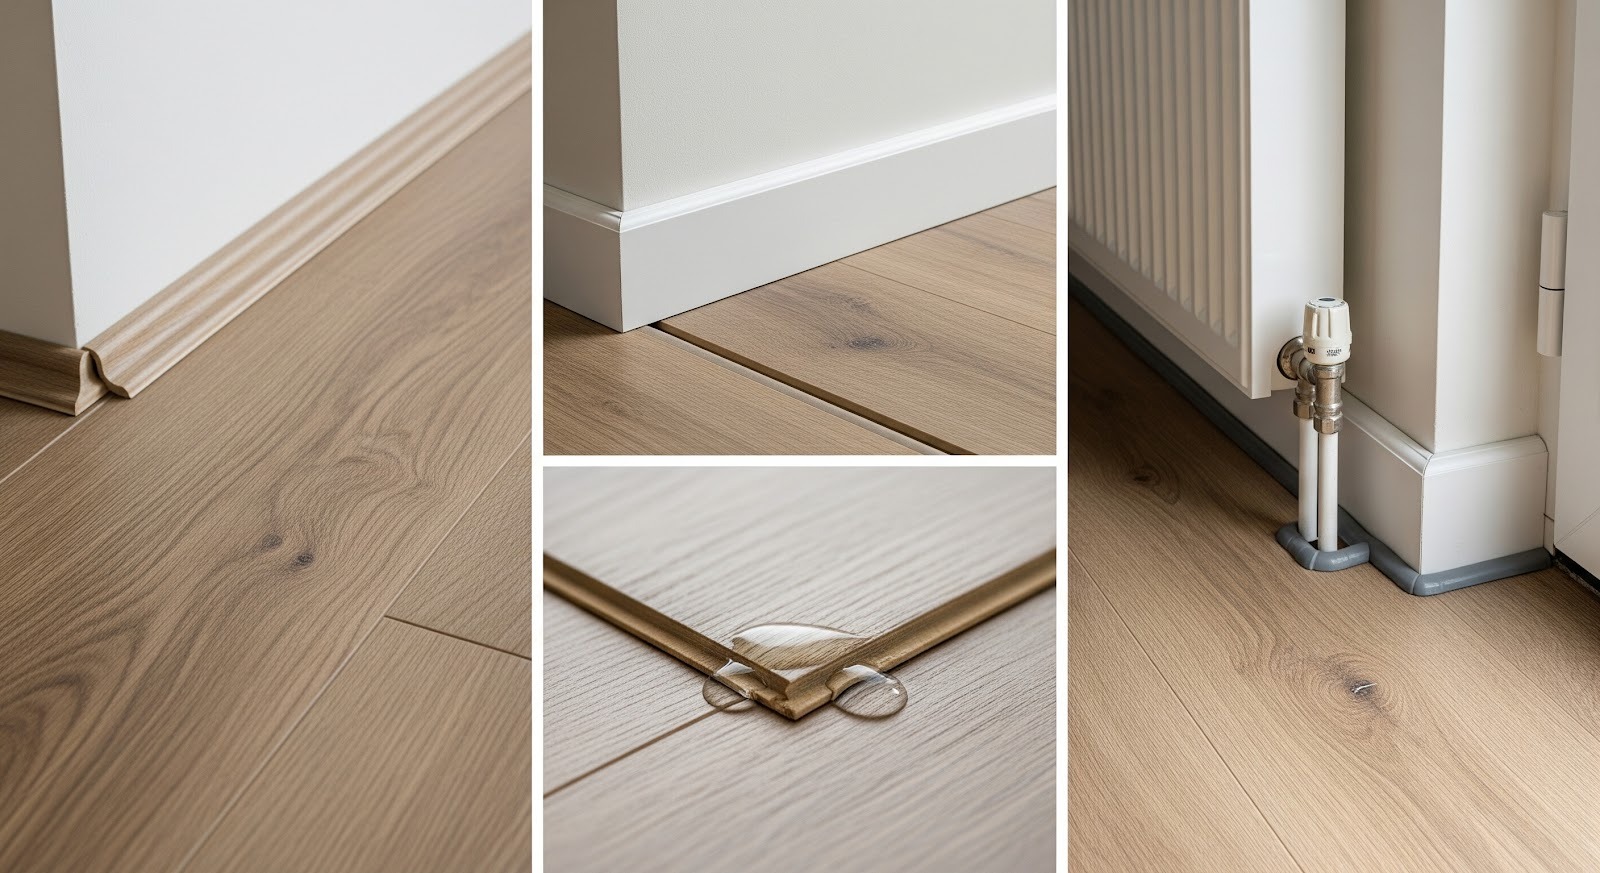
The edge finish with skirting boards is the final part of the renovation. Here you can opt for subtle adhesive skirting boards in the color of the floor or tall, white MDF decorative skirting boards that are mounted against the wall. The latter option is technically preferable, because the floor below can move freely without the skirting board moving along. For a unique industrial or minimalist effect, you may rarely consider modifying the top layer, but in general, the factory finish of high-quality laminate is already optimal for most interior styles.
Surface protection against moisture
In kitchens or entrances, it is advisable to protect the joints additionally. Although painting laminate is not technically the standard method for color change, there are transparent sealers and special coatings that can be applied over the seams. These coatings provide a hydrophobic barrier, preventing spilled water from penetrating directly into the core of the board. At Bricknest, we pay extra attention to the finish of kitchens and radiator couplings, professionally sealing any holes around pipes with rosettes or flexible sealant.
Common mistakes
Errors in the installation of laminate often only become visible after a first change of season. As experts, we often see situations that could easily have been prevented with the right technical knowledge.
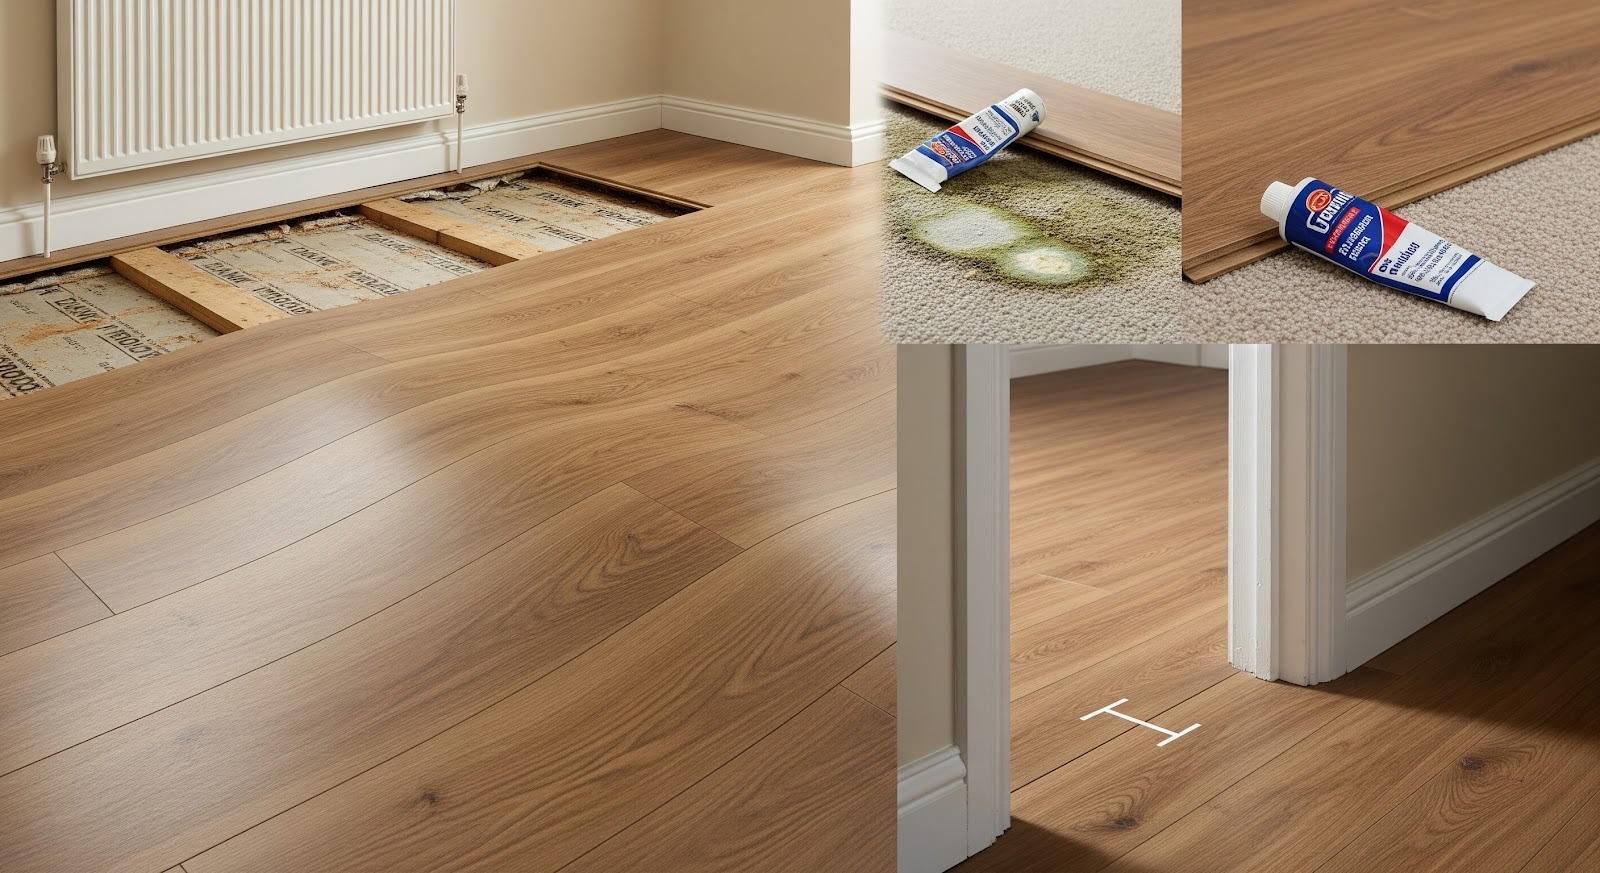
Improper placement of the joints
A critical mistake is the creation of so-called “T-joints” where the ends of adjacent rows are too close together. This weakens the structural integrity of the floor. Another common mistake is laying the floor too tight against doorposts or heating pipes. When the humidity rises in autumn and the laminate expands, the floor runs out of space, so it rises in the middle of the room (sufficient). Repairing this often requires dismantling the entire floor up to the bottleneck.
Use of inappropriate materials
Using the wrong subfloor on a wooden construction floor (e.g. a vapour-proof film where a breathable one is needed) can lead to the subfloor choking and rotting.
Our inspectors pay attention to the following pitfalls for each project:
- The absence of a moisture barrier on a mineral surface (concrete).
- Laying laminate over an existing soft floor covering such as carpet, leading to instability and mold.
- Failure to use the prescribed adhesive in 'non-click' systems.
- Ignoring the maximum length and width of the floor without intermediate expansion profiles.
By ruling out these errors, Bricknest guarantees a floor that remains stable and still for decades.
Laminate maintenance
Once installed, laminate is very easy to maintain, provided that you follow the technical cleaning instructions. Improper maintenance can make the top layer dull or damage the joints.
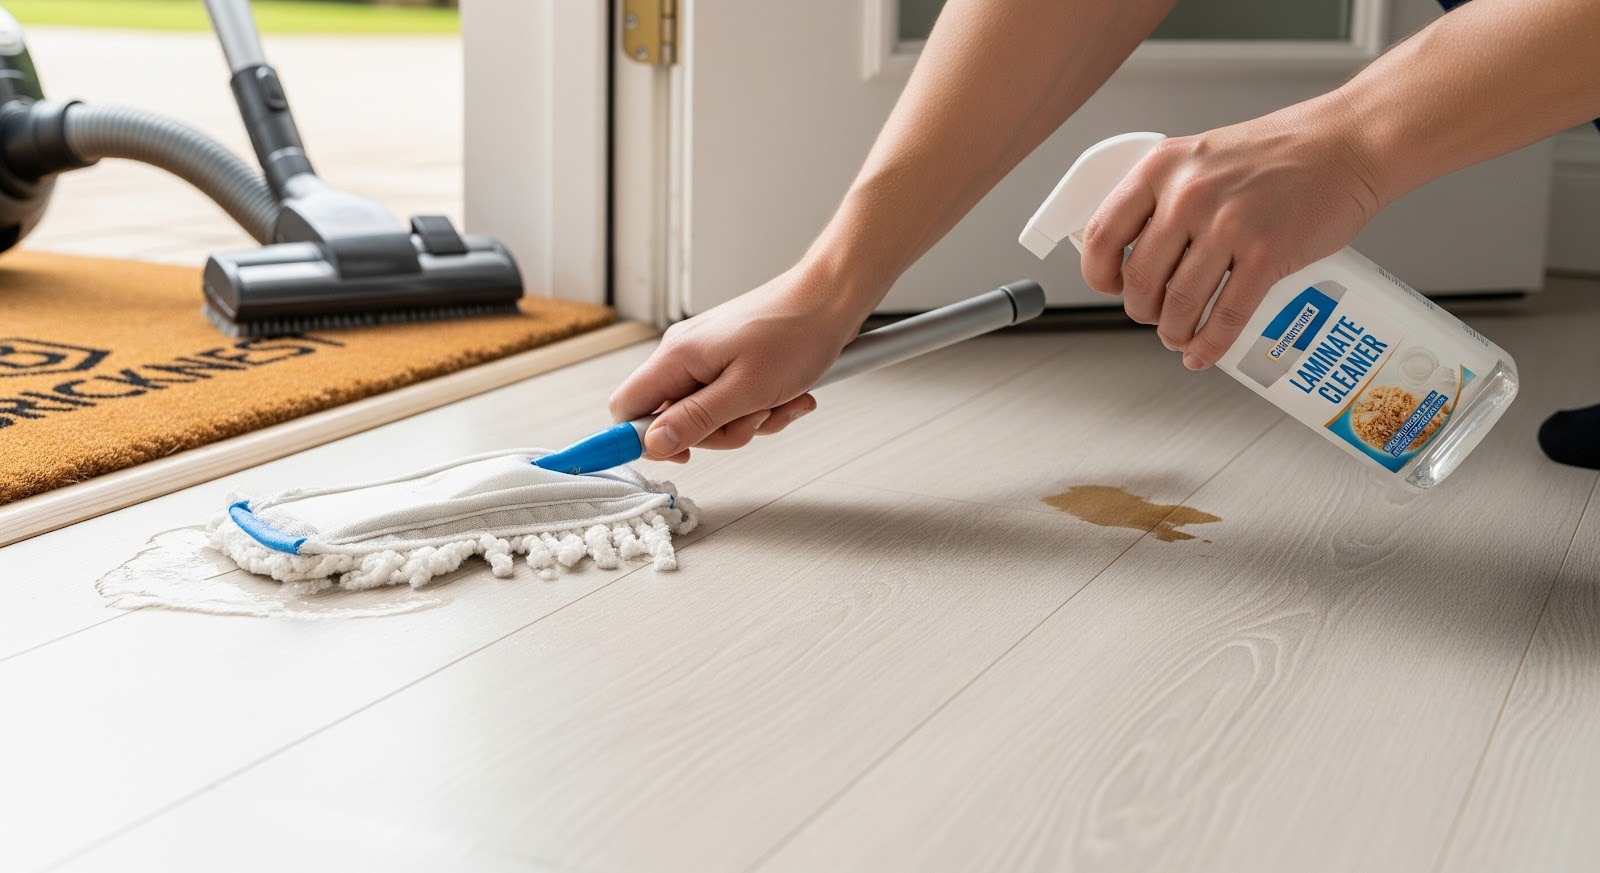
Daily cleansing and prevention
Sand and dirt act like sandpaper on the melamine top layer of the laminate. We therefore recommend using a high-quality walk-in mat at every entrance. Daily dust removal with a soft brush or a parquet brush vacuum cleaner is the best prevention. When cleaning wet, it is essential that the mop is only “slightly damp”; excess water is laminate's biggest enemy and can lead to permanent damage to the edges of the panels.
Maintaining aesthetics and sustainability
Only use cleaning products that have been specifically developed for laminate. Avoid all-purpose cleaners, waxes or polishes, as they leave a greasy layer that makes stains and footsteps more visible. To remove persistent stains such as ink or nail polish, a small amount of acetone can be used on a cloth, provided it is neutralized immediately afterwards with water. By following these simple but strict rules and respecting the professional basis that Bricknest has laid, your laminate floor will stay looking like new year after year.
